How to build a base for an electric fireplace with bookshelves and a space for a TV on the top with a reclaimed wood mantel. A unique way to add character to your home
This post is SO EXCITING to me! We have been dreaming about and planning this space for a while now, and it is so much fun to see it actually coming together! We’ve always felt like our old house really needed a fireplace, but it was just way too expensive to add a ‘real’ one. After seeing that electric fireplaces could actually look beautiful, and not just cheesy, we decided to make a plan to add one to our home.
Building a base for an electric fireplace
Now, let me explain something. We usually do our own DIY work, and that’s what you’re used to seeing in tutorials here on my site. But we also have a handyman who we have worked with since the beginning of our fixer upper journey, and he’s been a great resource for us. We work well together, he’s well priced, and is willing to do work like this for us so we can keep costs down on bigger projects. You can read more about how we found our contractor and how we save money during renovations in this post.

So I came to our handyman, Tim, with my plan, and asked him how much it would cost to do something like this. I had it all planned out, with drawings and dimensions, to make sure lines of communication were clear. But here’s the part where we kept costs down: we asked him for a quote for how much the actual structure would cost, and then we will finish it all off and make it look awesome.
My husband is a wonderful man and has learned SO much through this process of having a fixer upper, but he does not do this kind of work for a living. He works at a seminary and would love to read books and write all day long – he’s very gracious to put up with my projects! (actually – did you know HE has a blog? Come check it out here – he’s a professionally trained writer and does a much better job at it than I do) 😉
Decide if it’s worth it for you:
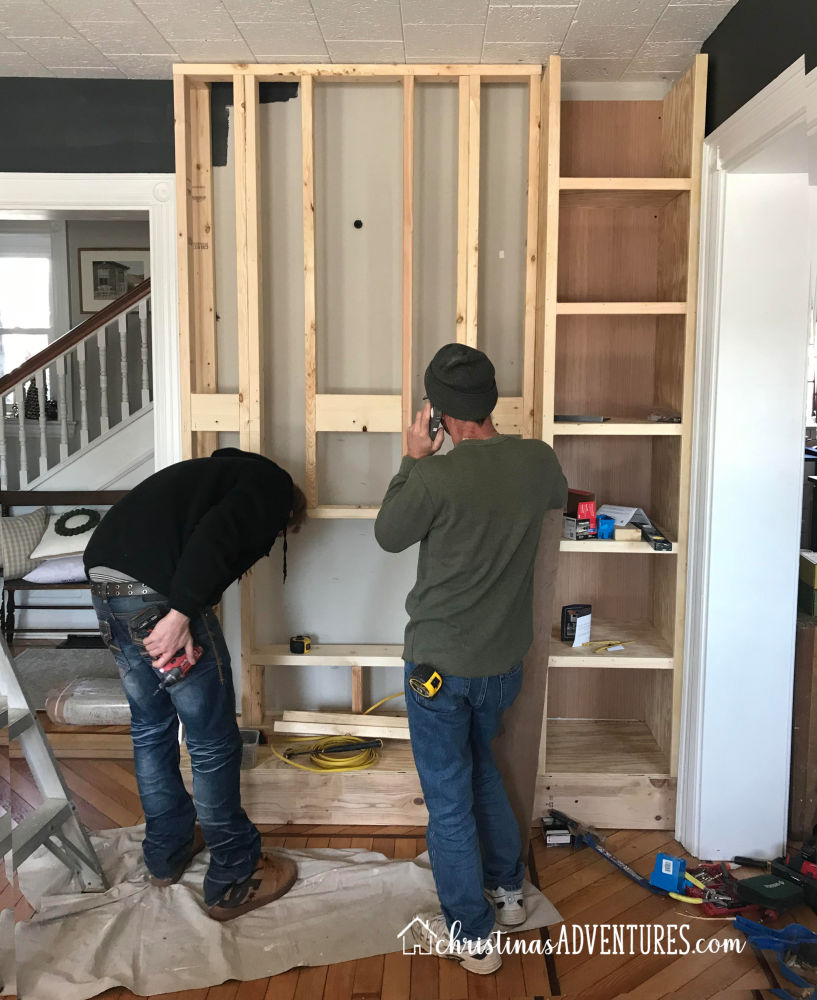
OK, back to the topic of our built-ins. We had Tim over, went over details of which materials we should use for the project, where we’d need to deal with electrical issues, and specifics of how this was actually going to work. And he quoted us at $500. This was within our budget, but it may not be within yours. You might be able to build a unit like this without too much effort, but if we’d try to build a piece like this, we would take WAY more time and we would probably not do it as well.
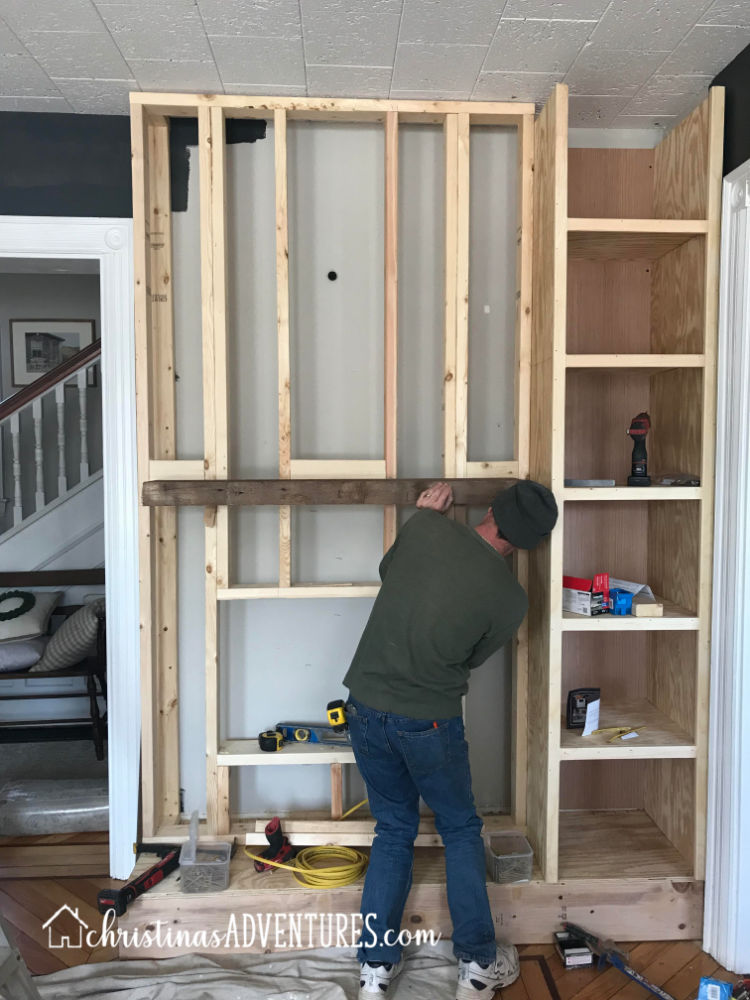
This is where we found it’s really helpful to work with a handyman who will be flexible with builds like this. He left the project unfinished, but left it at a place where we really only need to put in some cosmetic work. I know it’s not beautiful yet, but it’s SO CLOSE. The hard part is done!
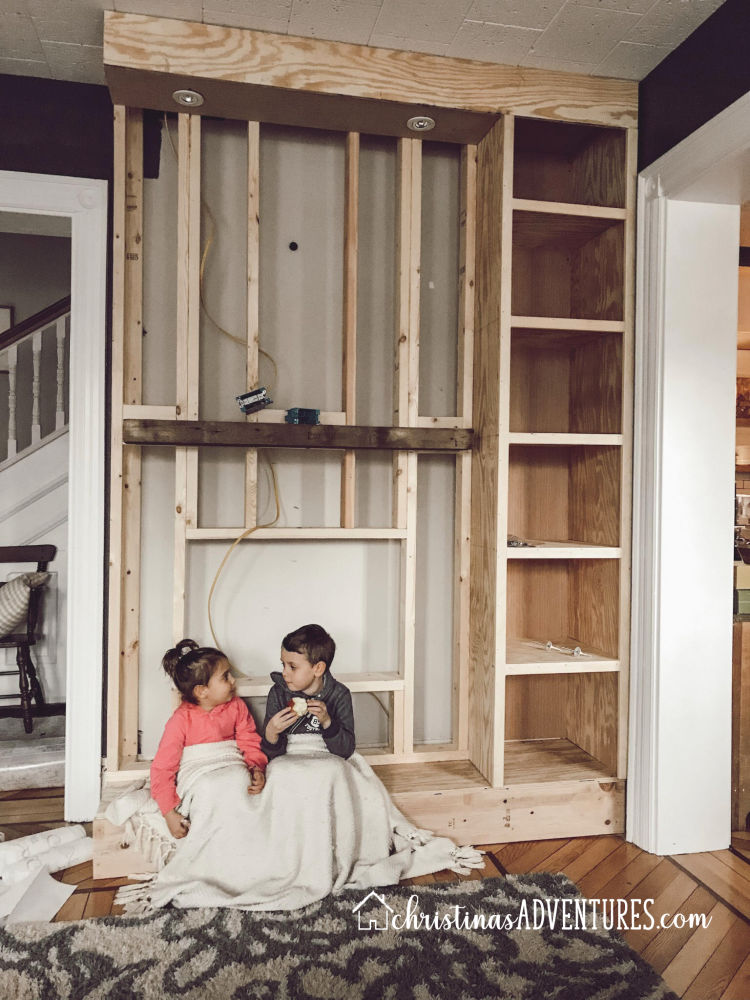
One really cool thing I’m exited about is the last minute addition of lighting. We have no overhead lighting in this room, and adding that soffit with recessed lighting seems like such an upgrade! Since we’re officially talking numbers…I’ll let you know that the total check we wrote out for our handyman ended up being $600 because of a few electrical changes and minor issues, but we still felt like that was very fair and we are thrilled with how this is looking in our family room!
Now comes the fun part:
SO glad I designed the space to have the little “seat” by the fire…can’t wait until we actually get the finishing touches done and the fireplace in so we can REALLY sit here and enjoy the fire!
Make sure you’re following on Instagram to see the progress of the space as we make it beautiful! I don’t want to give it all away…but it’s going to include brick, dark shiplap, wood accents and maybe even a little bit of peel & stick wallpaper!

What were your dimensions of the entire built in, including the shelf?
Looks beautiful!!
sorry we don’t live in this home anymore and I can’t give you the dimensions 🙂
Do you have a link to a post of the finished fireplace? Would love to see!!
yes you can see the finished fireplace here! 🙂 https://christinamariablog.com/our-new-built-in-electric-fireplace/