Sharing our plans for our family room makeover, and how we plan on transforming it into a character filled space. Affiliate links are included – full disclosure here.
We have grand plans for our family room. Someday, it’ll be a beautiful, character filled space with lots of texture an interest.
As of right now? It’s a slightly yellow-ish box of a room.
Unfortunately, we don’t have the budget to change this room in 30 days. BUT we have a plan, and I am going to take you with me every step of the way – whenever it does happen!
So – consider this Phase 1 of the family room makeover. I’m sure other people have the budget to do it all at once, but we don’t! And that’s OK! We’re all about achievable makeovers over time that make a house a home that we love. I’ll share the ideas for Phase 2 and Phase 3 at the bottom of this post!
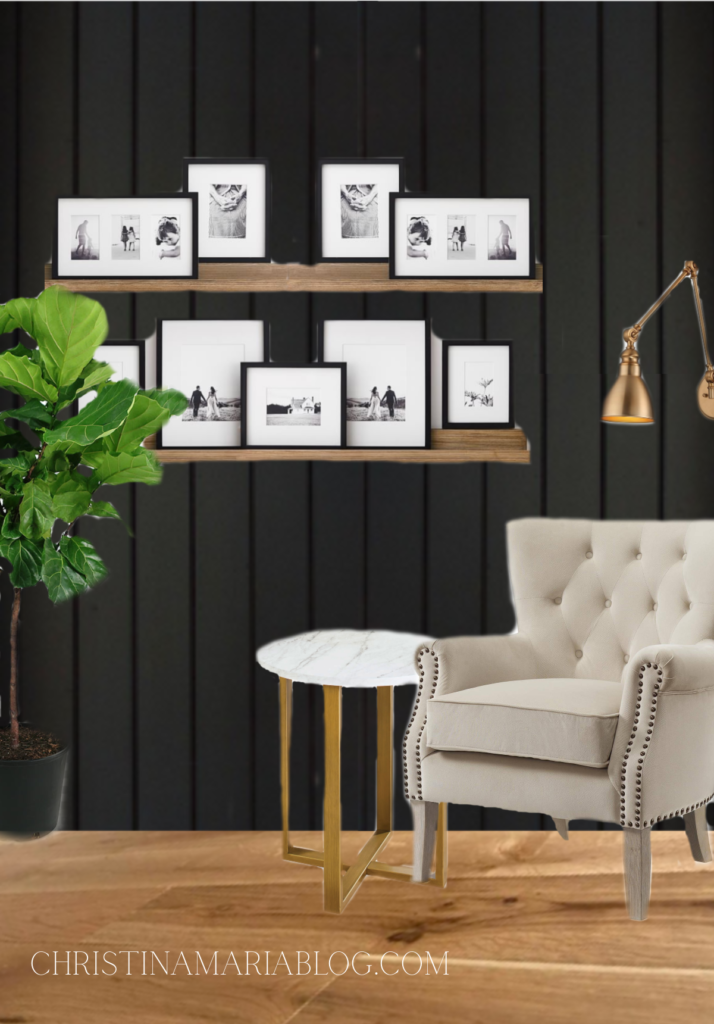
If you’re following me on Instagram, you’re seeing my plans in my stories. We’re currently working on wall #1 … the plan is to transform it from a plain awkward wall in the middle of our house into a moody cozy and character filled space.
Here’s the plan for PHASE 1 of our family room … transforming our blank beige wall into this:

Here’s how we’re making it happen:
Up first: shiplap!
But not actual shiplap. We’re using tongue and groove boards, and we’ll be installing them vertically instead of horizontally. And since we already have some “real” shiplap near this wall, I want to vary the look a little bit. I ordered tongue in groove boards in two different widths, so I could alternate the widths of the board when we adhered them to the wall.
We ordered these tongue and groove boards which didn’t have good reviews, but we took a chance since we’re literally in the middle of a pandemic and we needed to find something that we could have shipped to us (and the free shipping was a plus too!) Just a warning that it took a LONG time to get here (I’m sure the pandemic didn’t help with that either) so if you’re in a rush – maybe don’t choose this product!
These are the boards we bought (8 feet long & I bought the 6 inch and 8 inch widths):
If you follow me on Instagram then you see that I’ve already started this project … and I’m working on doing most of it MYSELF which feels so good! It’s a learning curve and my husband is being patient with me haha.
If you go through my “family room” highlight on Instagram, then you’ll see that I miscalculated the wall (dang it!) and we actually needed way more of these boards than we anticipated. So…the boards are not cheap and this project is turning out to be a lot more expensive than it was supposed to be!
Furniture:
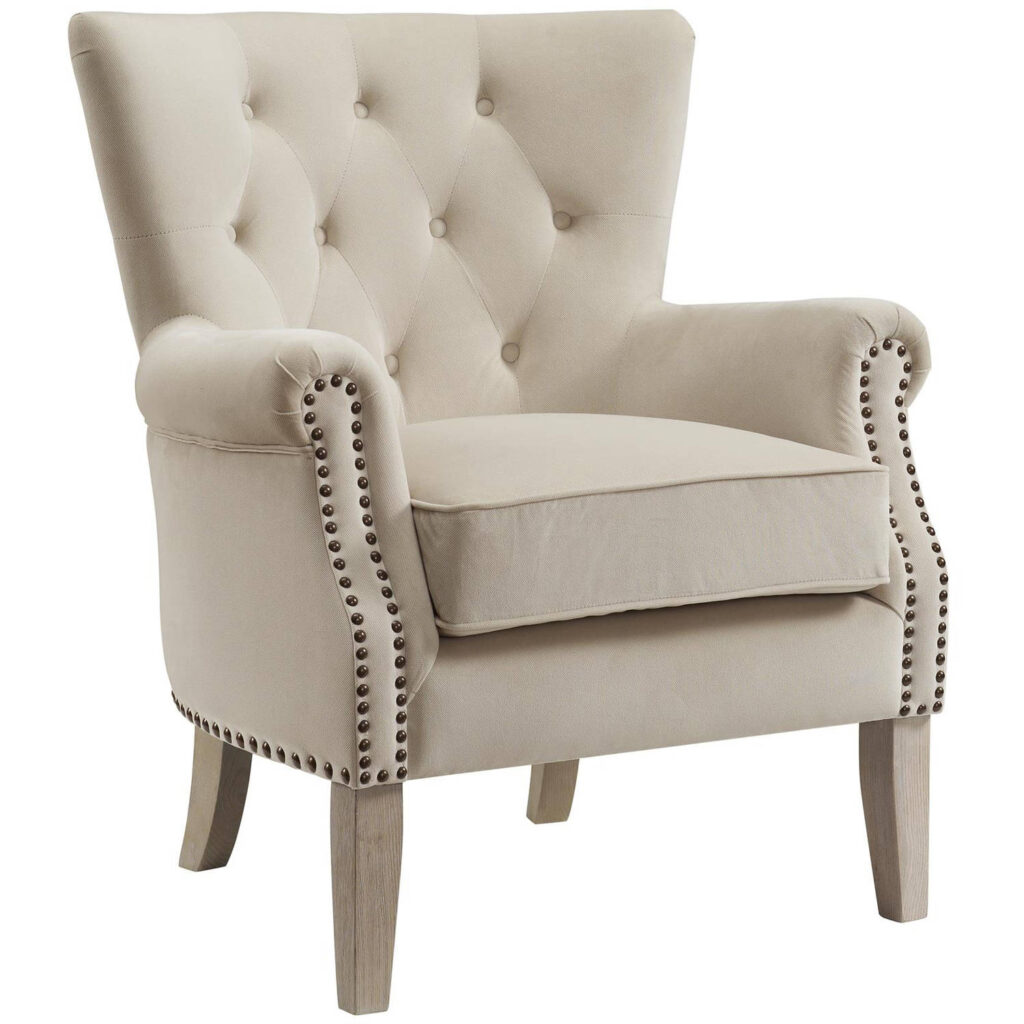
Since we wanted to add some more seating for a conversational feel in our family room (the only current seating we have is our sectional) I bought an inexpensive chair from – Walmart! It’s not the first chair I’ve bought from there and it probably won’t be the last! I’ve been pleasantly surprised with their furniture quality for the price.
Here’s the chair we bought – and I’ll let you know that we do like it!
If I had to choose between the recliner we bought from Walmart and this chair, I’d pick the recliner though. It’s deeper & roomier and a better “snuggle up with a book and read” chair. But the chair we bought for the family room is perfect for what we need it for: conversational seating for whenever friends come over and we don’t all want to sit on the couch!
Click here for the chair we bought for our family room
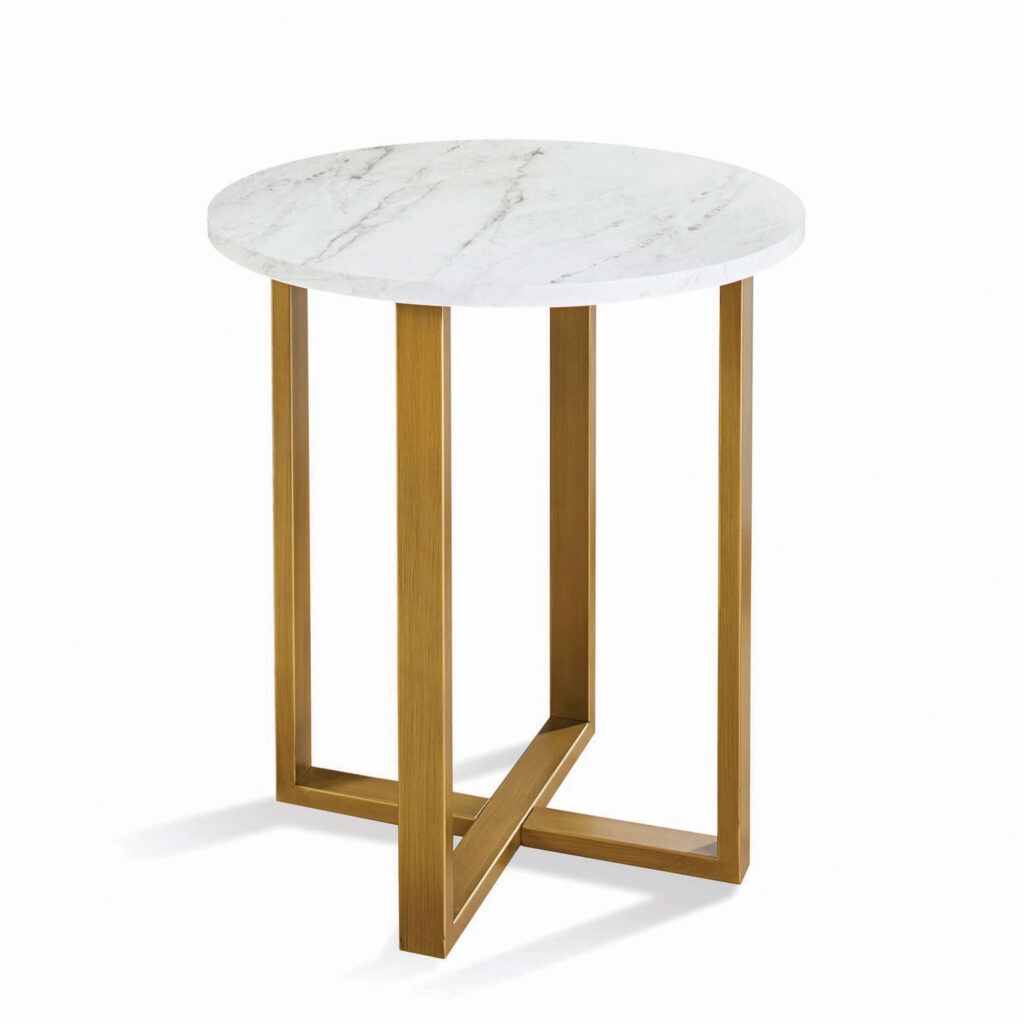
We also bought this end table which I honestly LOVE. It’s a great size, sturdy, and looks really classy…and has a great price point! I feel like it’s one of those pieces that could work in SO many homes.
Click here to shop this end table.
Sconce Lighting:
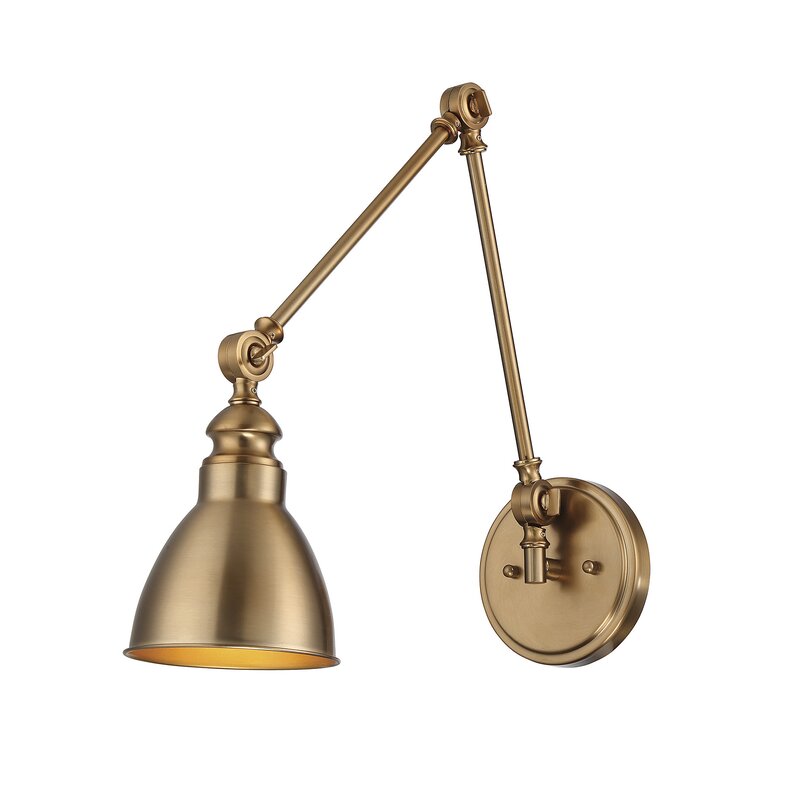
When I originally planned this room, I planned for 2 wall sconces. While this might be ideal for someone who loves symmetry, I am realizing more and more that I am not that person. I love a room with a little bit of balancing between objects instead of a symmetrical look. Also – two sconces would cost more money (we are having our electrician run wires to these fixtures since we don’t already have the hardwiring capabilities on the wall) and we’d have to pay for a second light fixture. We also don’t really need two! So for all of those reasons, I chose to just put one sconce on this wall.
I wanted to add a light fixture for functional reasons (cozy lamp light by a reading chair is the actual best) but for aesthetic reasons as well. The warm metallic tone of this sconce I bought is perfect for this space!
Click here to shop this wall sconce
We did get these sconces hardwired BUT 90% of the time I put sconces in my home, I actually use the plug-in kind! It makes it way less permanent and gives flexibility in your room through the years.
I wrote a post on all of my favorite plug in sconces – you can check out my picks here!
Picture Frame Ledges:
One of the easiest DIY projects you will ever do – and for a real low price tag too! These DIY picture ledges are a popular post on my blog already, but I’m going to work on putting these instructions in video format when I make them this time. I hope to prove to you that you CAN make these yourself and that it’s a really simple way to elevate your space on a budget!
Click here to see how we made the picture frame ledges in our last house!
Plants:
I always finish off a space that I’m designing with plants. I used to be a faux plant lover but I’ve been working on learning a lot about houseplant care over the past two years, and now I LOVE having real plants! This space will be finished off with at least two larger plants balancing out the chair on the right side of the wall.
The plants will be in baskets I’ve collected over the years – here’s a whole post about how I put plants in secondhand containers all through my home!


Leave a Reply