We surprised our kids with a finished basement for Christmas- filled with gross motor fun! A swing, slide, fort, ball pit – you have to watch their reaction! I’m breaking down the cost of this project at the bottom of the post if you’re interested! Affiliate links are used in this post – full disclosure here.
If you’re following on Instagram, then you’ve been walking through this makeover with me in my stories. It’s been SO fun to have you guys along for the ride, and I know you were so excited to see the kids reactions!
Make sure you listen to what happened on Christmas Eve – ahh!!
Here’s what we did in this basement:
Indoor swing:
We originally wanted to have two swings down here, but eventually realized we just didn’t have the space for it. We bought two swings, and we’ll use the caribiner for both swings.
The girls love the swing the most – it was definitely worth it for us to make the space to install it down in the basement! If you’re looking to do the same, just make sure you have enough clearance around all sides for the swing to move freely (without hitting walls or other structures).
Here’s BOTH of the swings we bought:

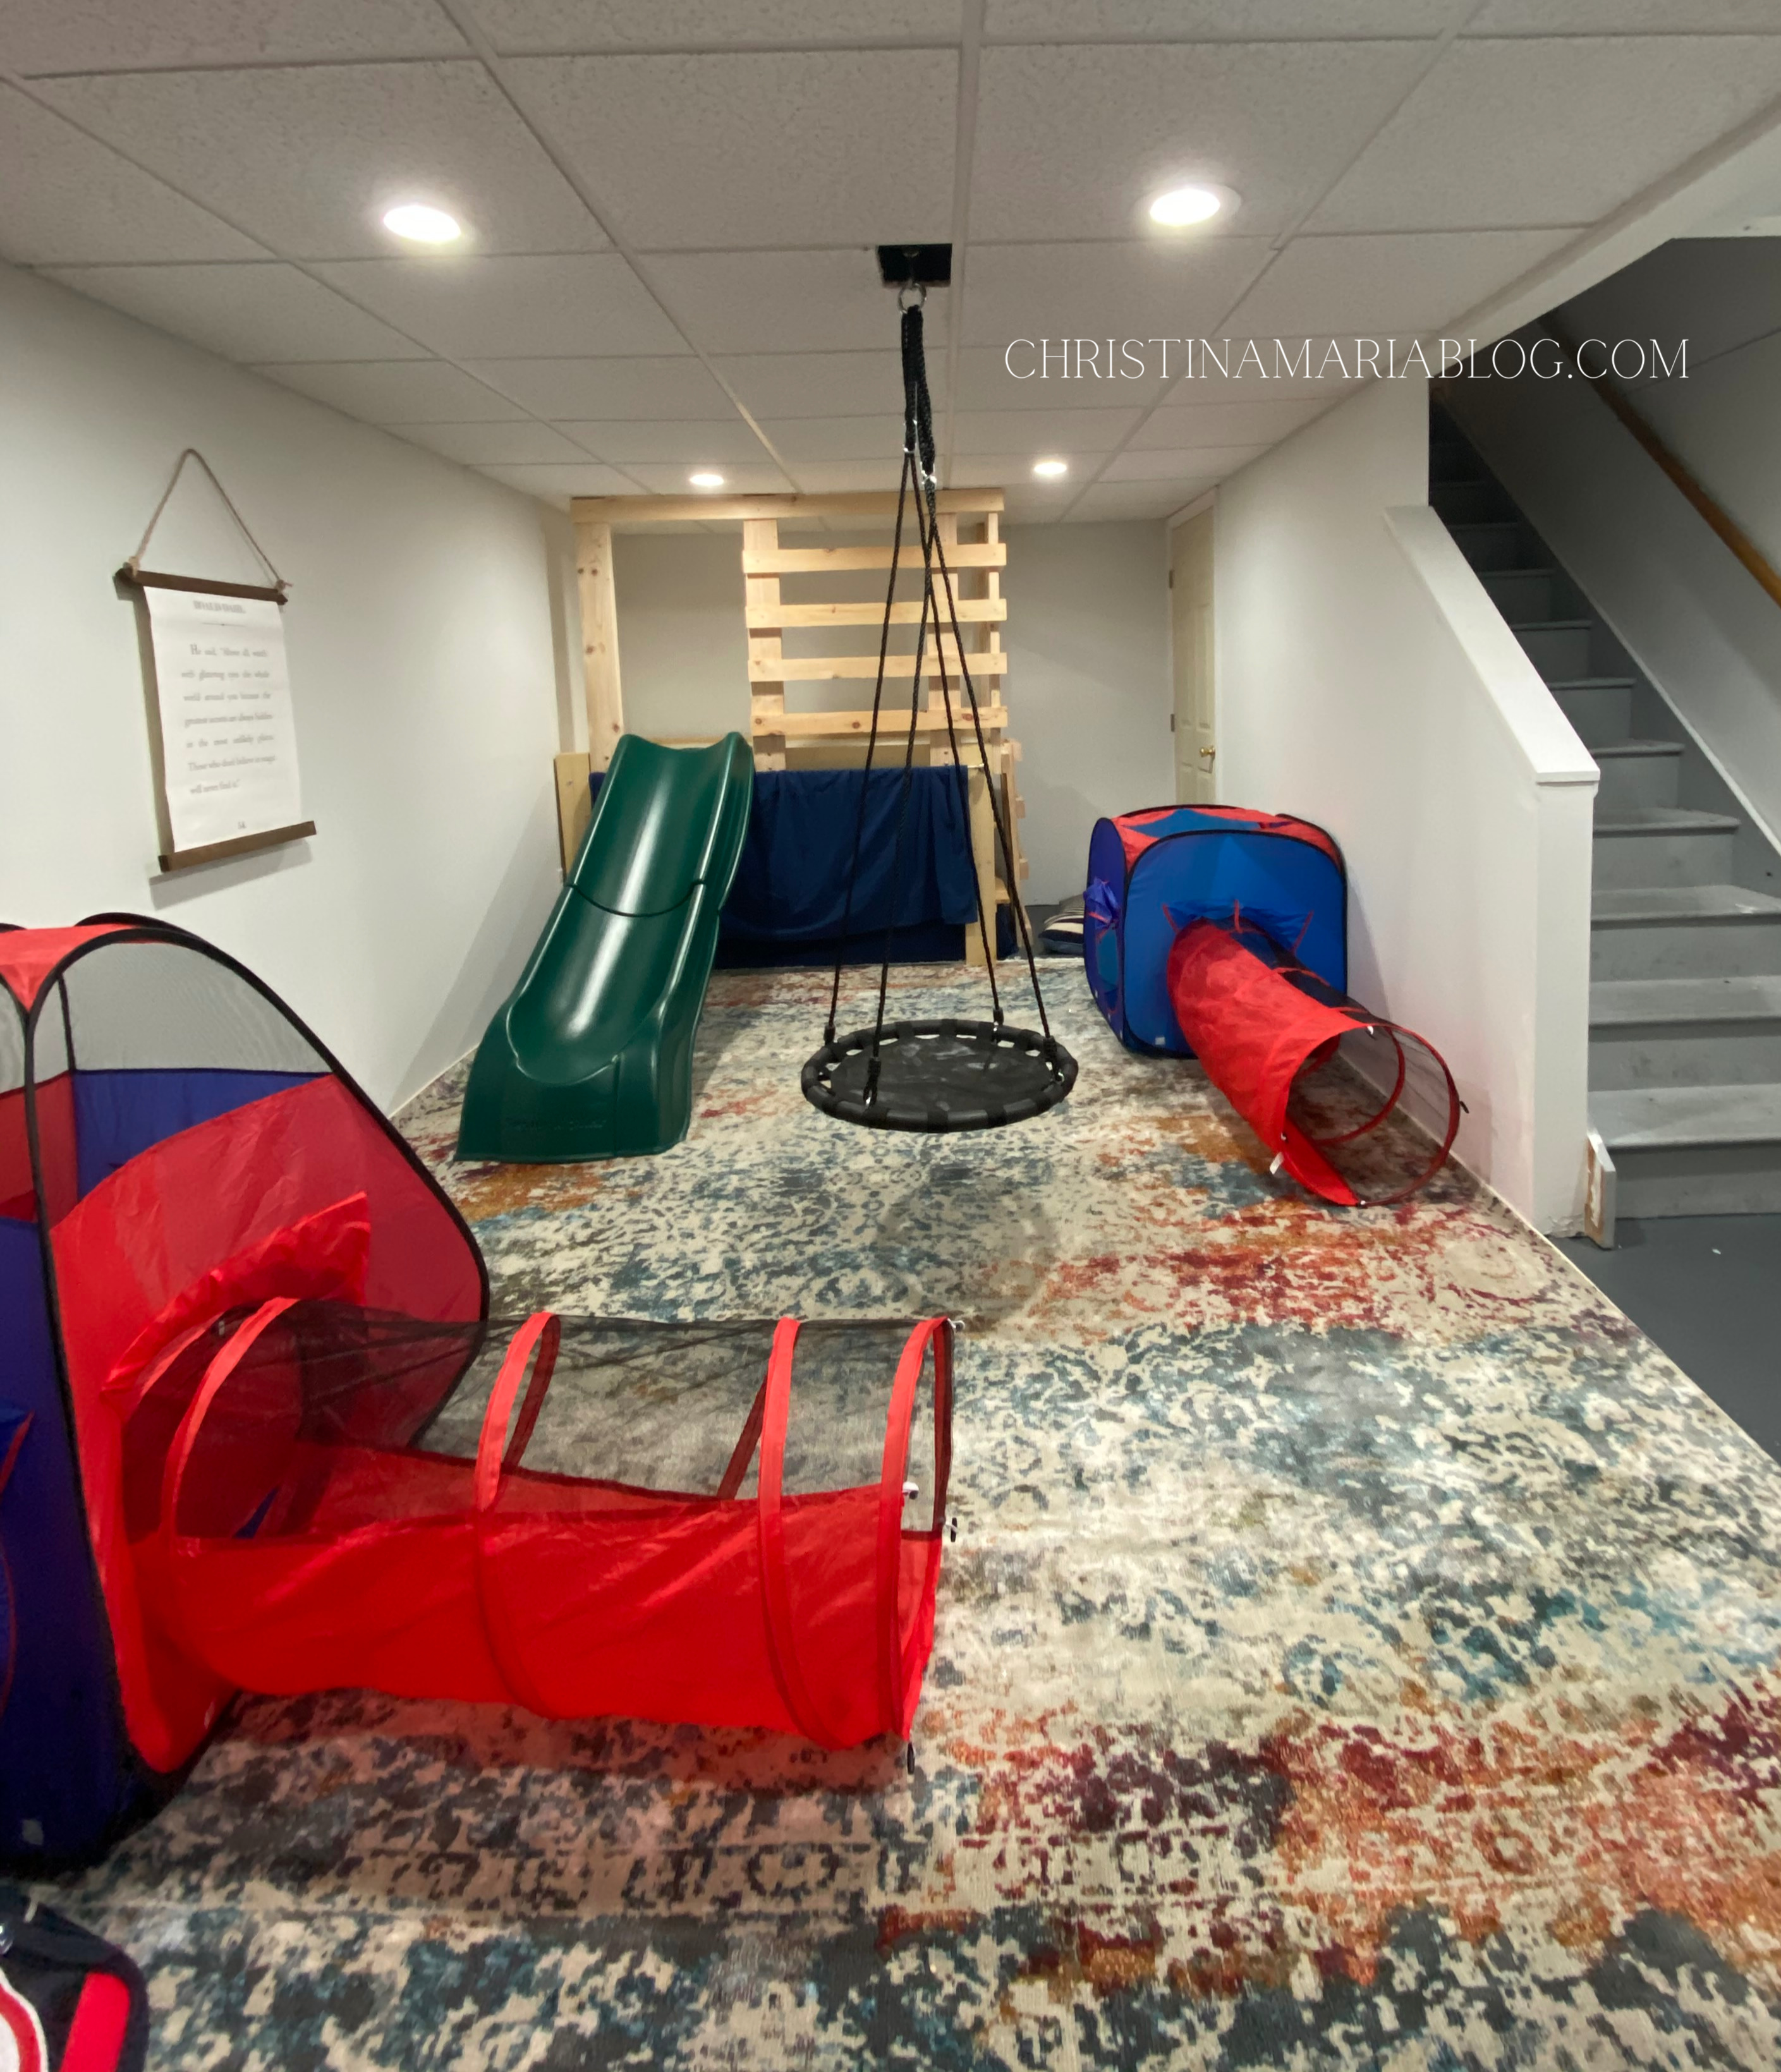
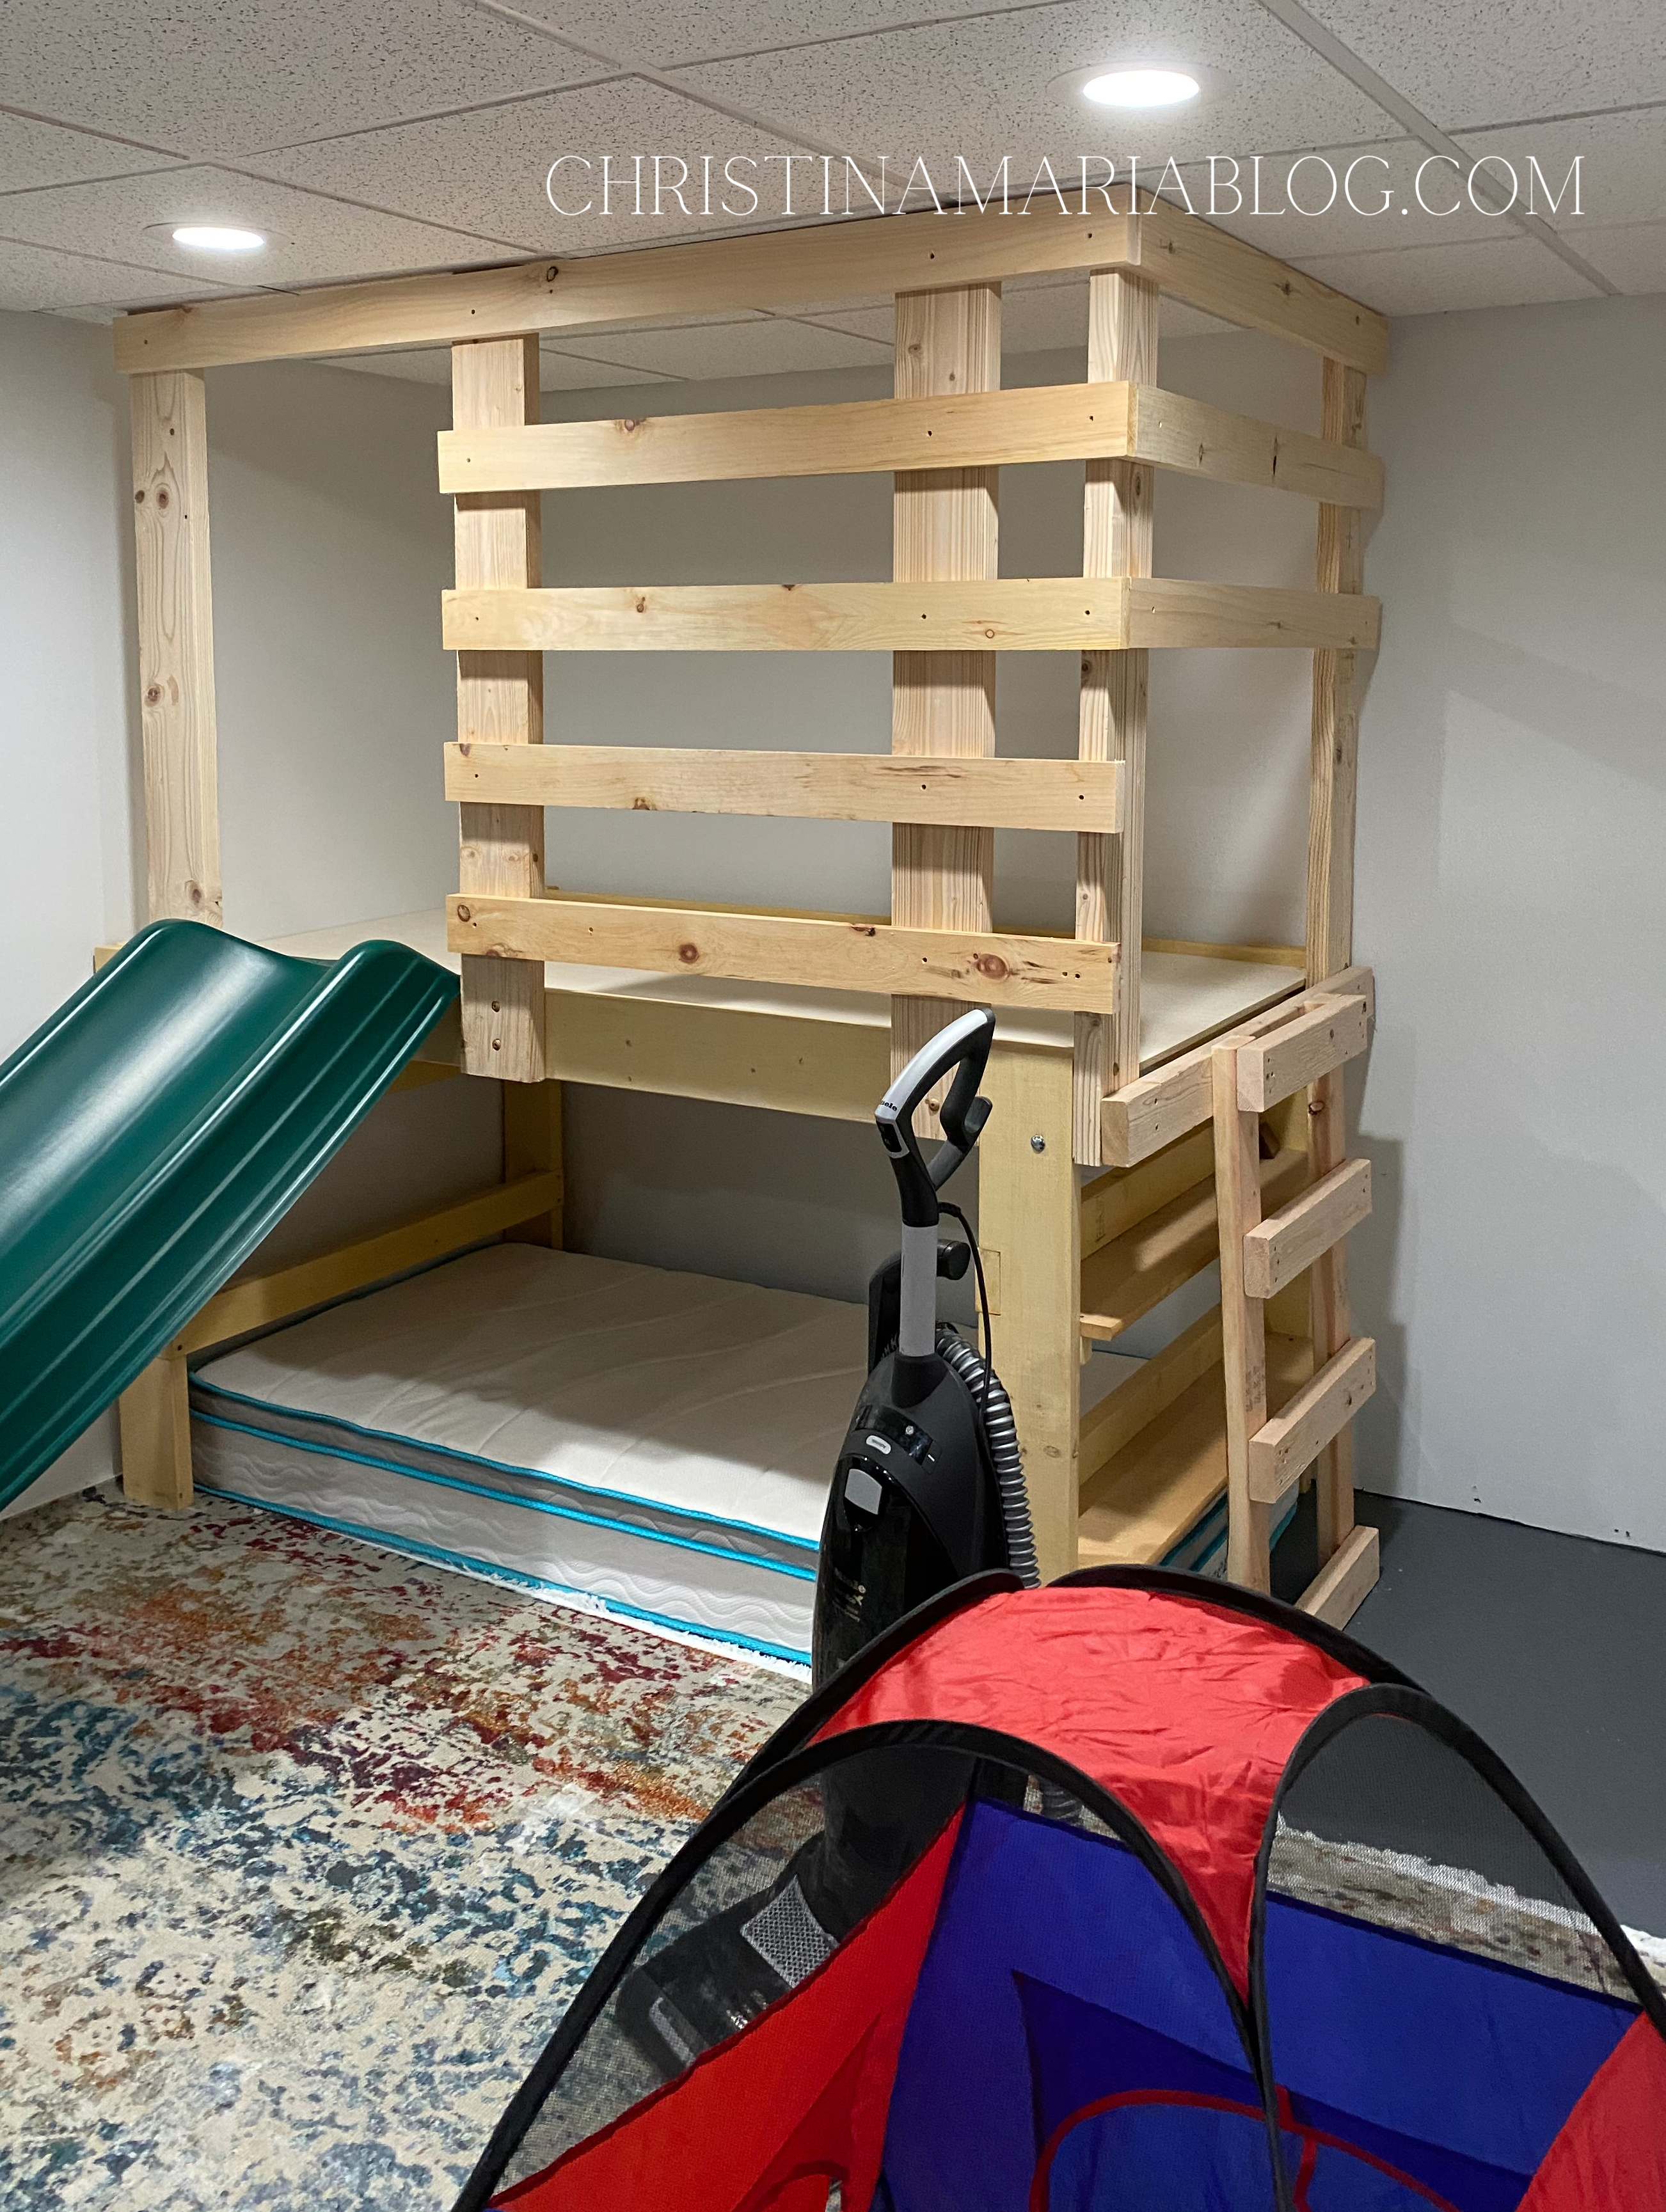
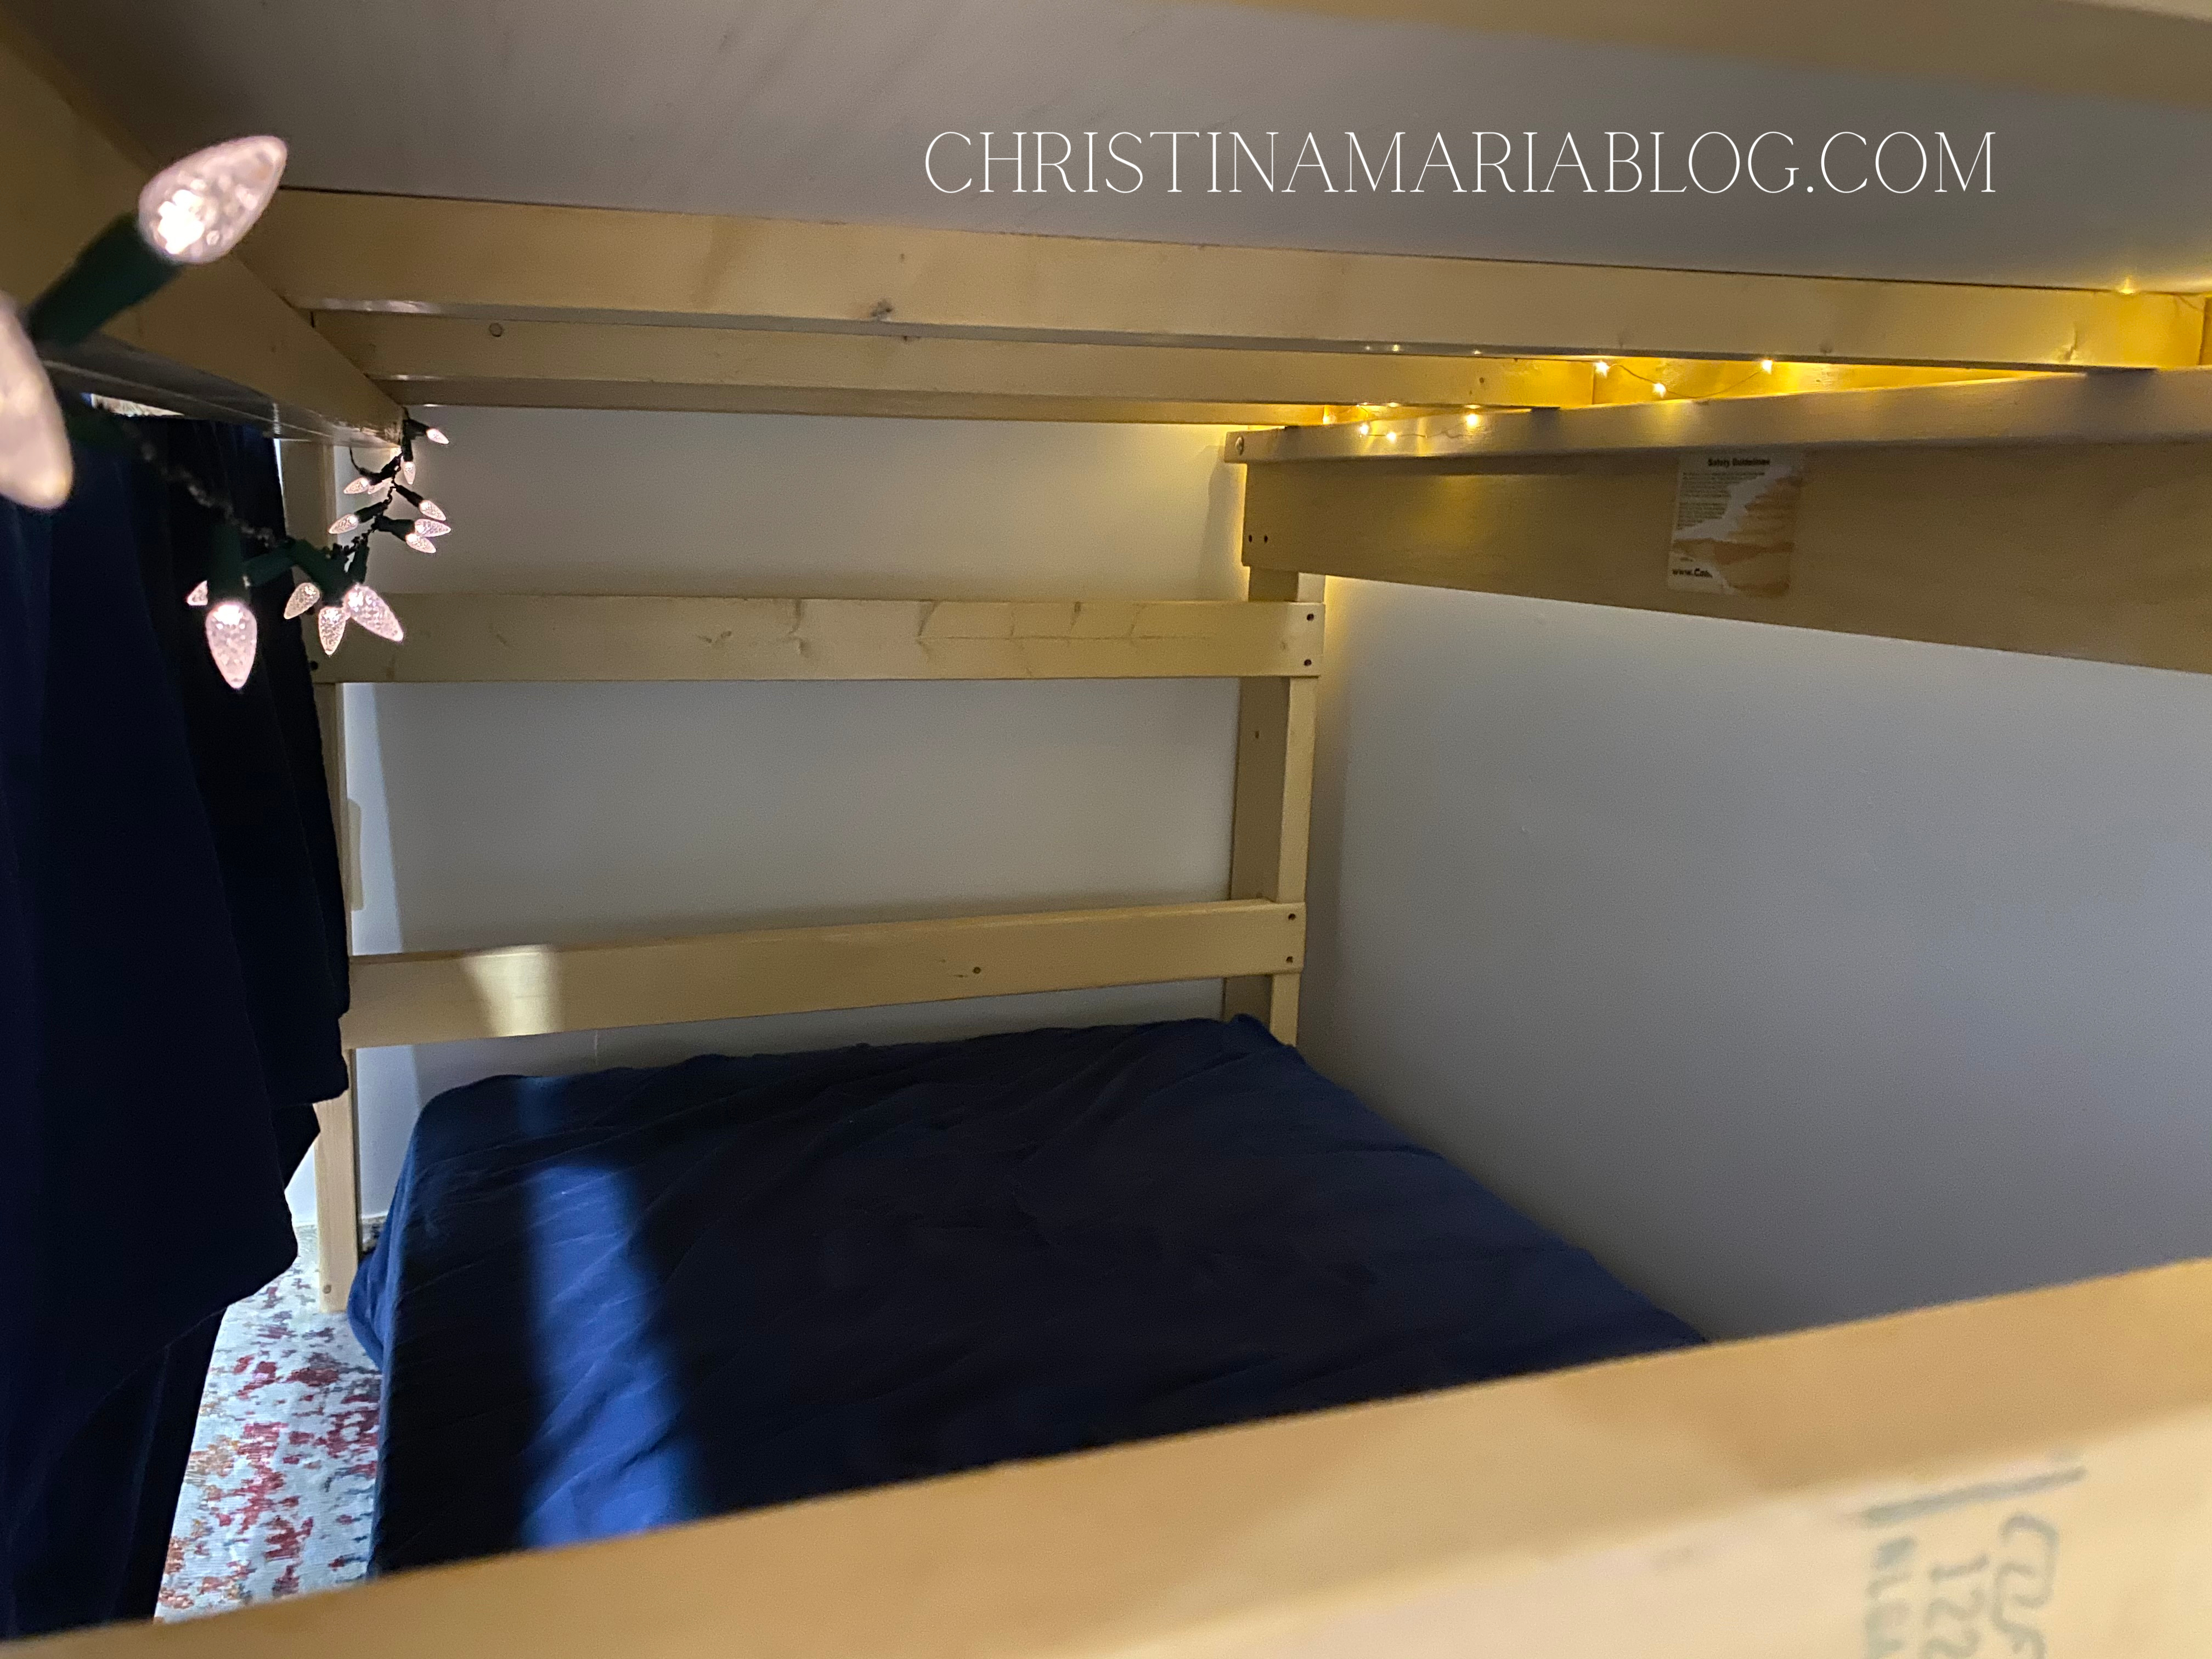
Slide & fort:
This was where we had to get creative. My parents had bought a loft bed for my younger brother when he was in grad school, and no one was using it. They were more than willing to get it out of their basement when I asked if we could use it for our project!
I don’t know if the exact model is still sold, but this is the website they ordered the bed from originally. It’s very basic and unfinished – I can’t wait to paint the whole structure someday! But that just wasn’t able to happen before Christmas.
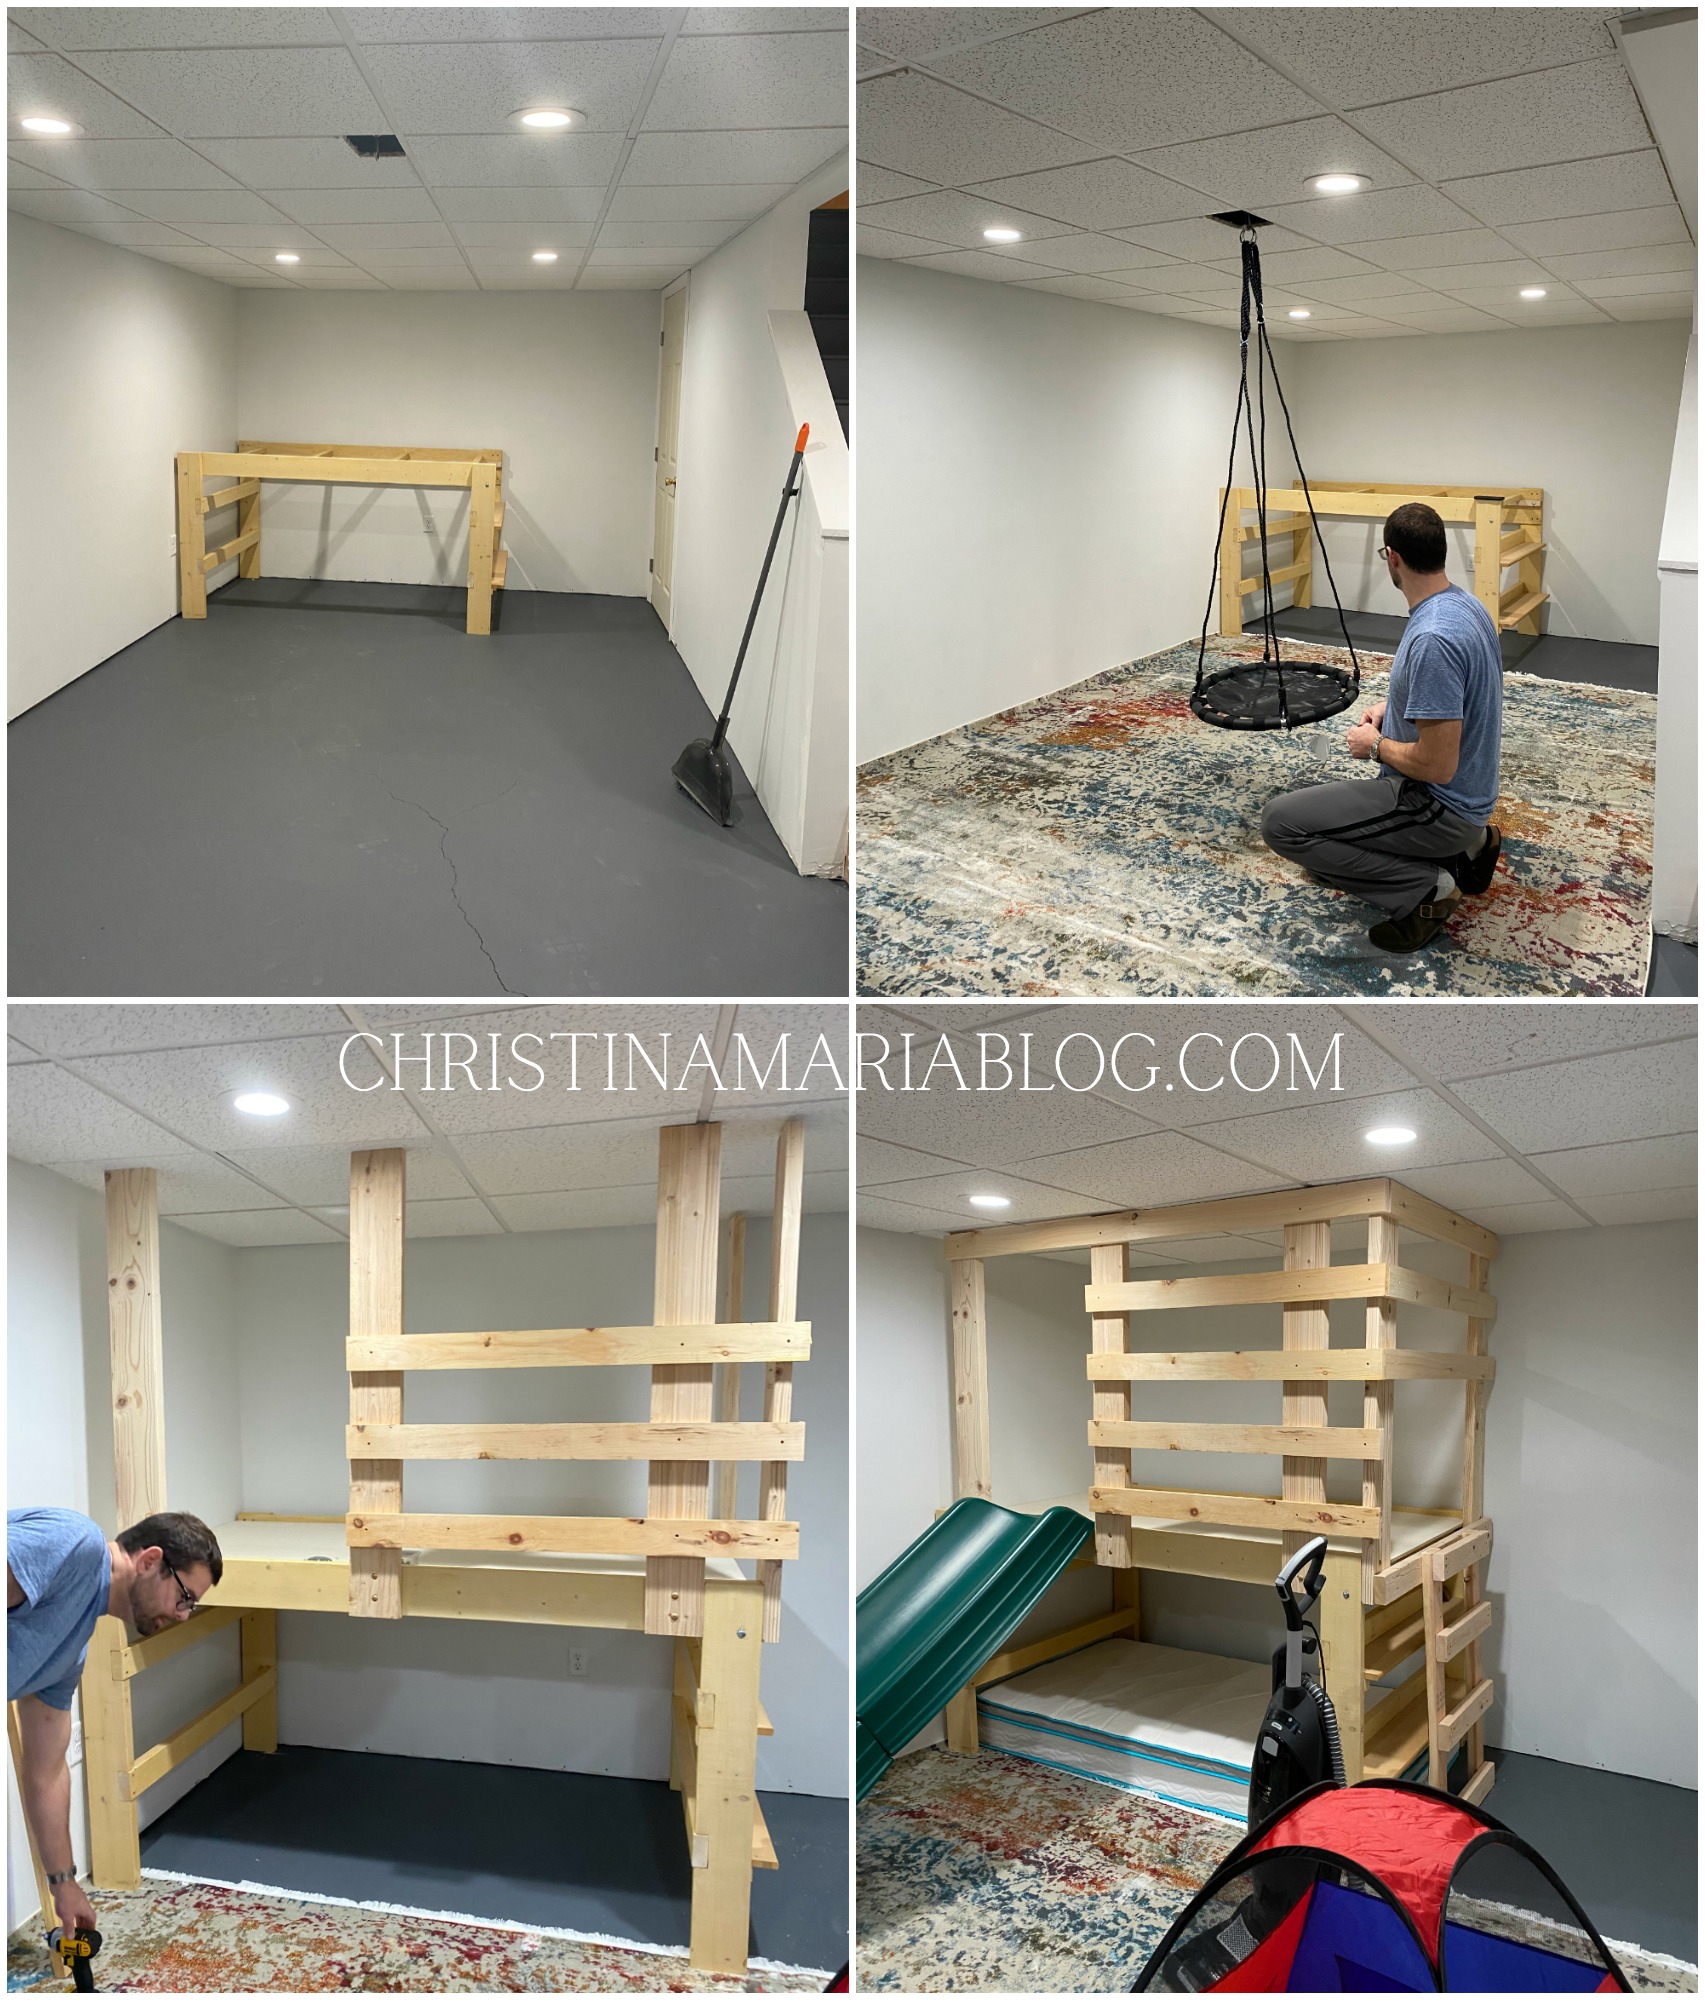
We bought this slide because it had good reviews & the price was right. It says it’s made for 4 foot decks – our landing was closer to 3.5 feet. If the incline of the slide didn’t work, then we were planning on raising the structure another 6 inches or so on wood blocks, but that didn’t end up being necessary.
We added a twin mattress to the bottom of the fort to make a soft cushioned area down there. If you see in the video, we added a sheet on a curtain rod. The truth is – we ordered THESE CURTAINS and with Christmas shipping issues, they didn’t come in time for Christmas morning.
We also added battery operated twinkle lights down there and put a soft fitted sheet on the mattress to make a cozy quiet space for the kids.
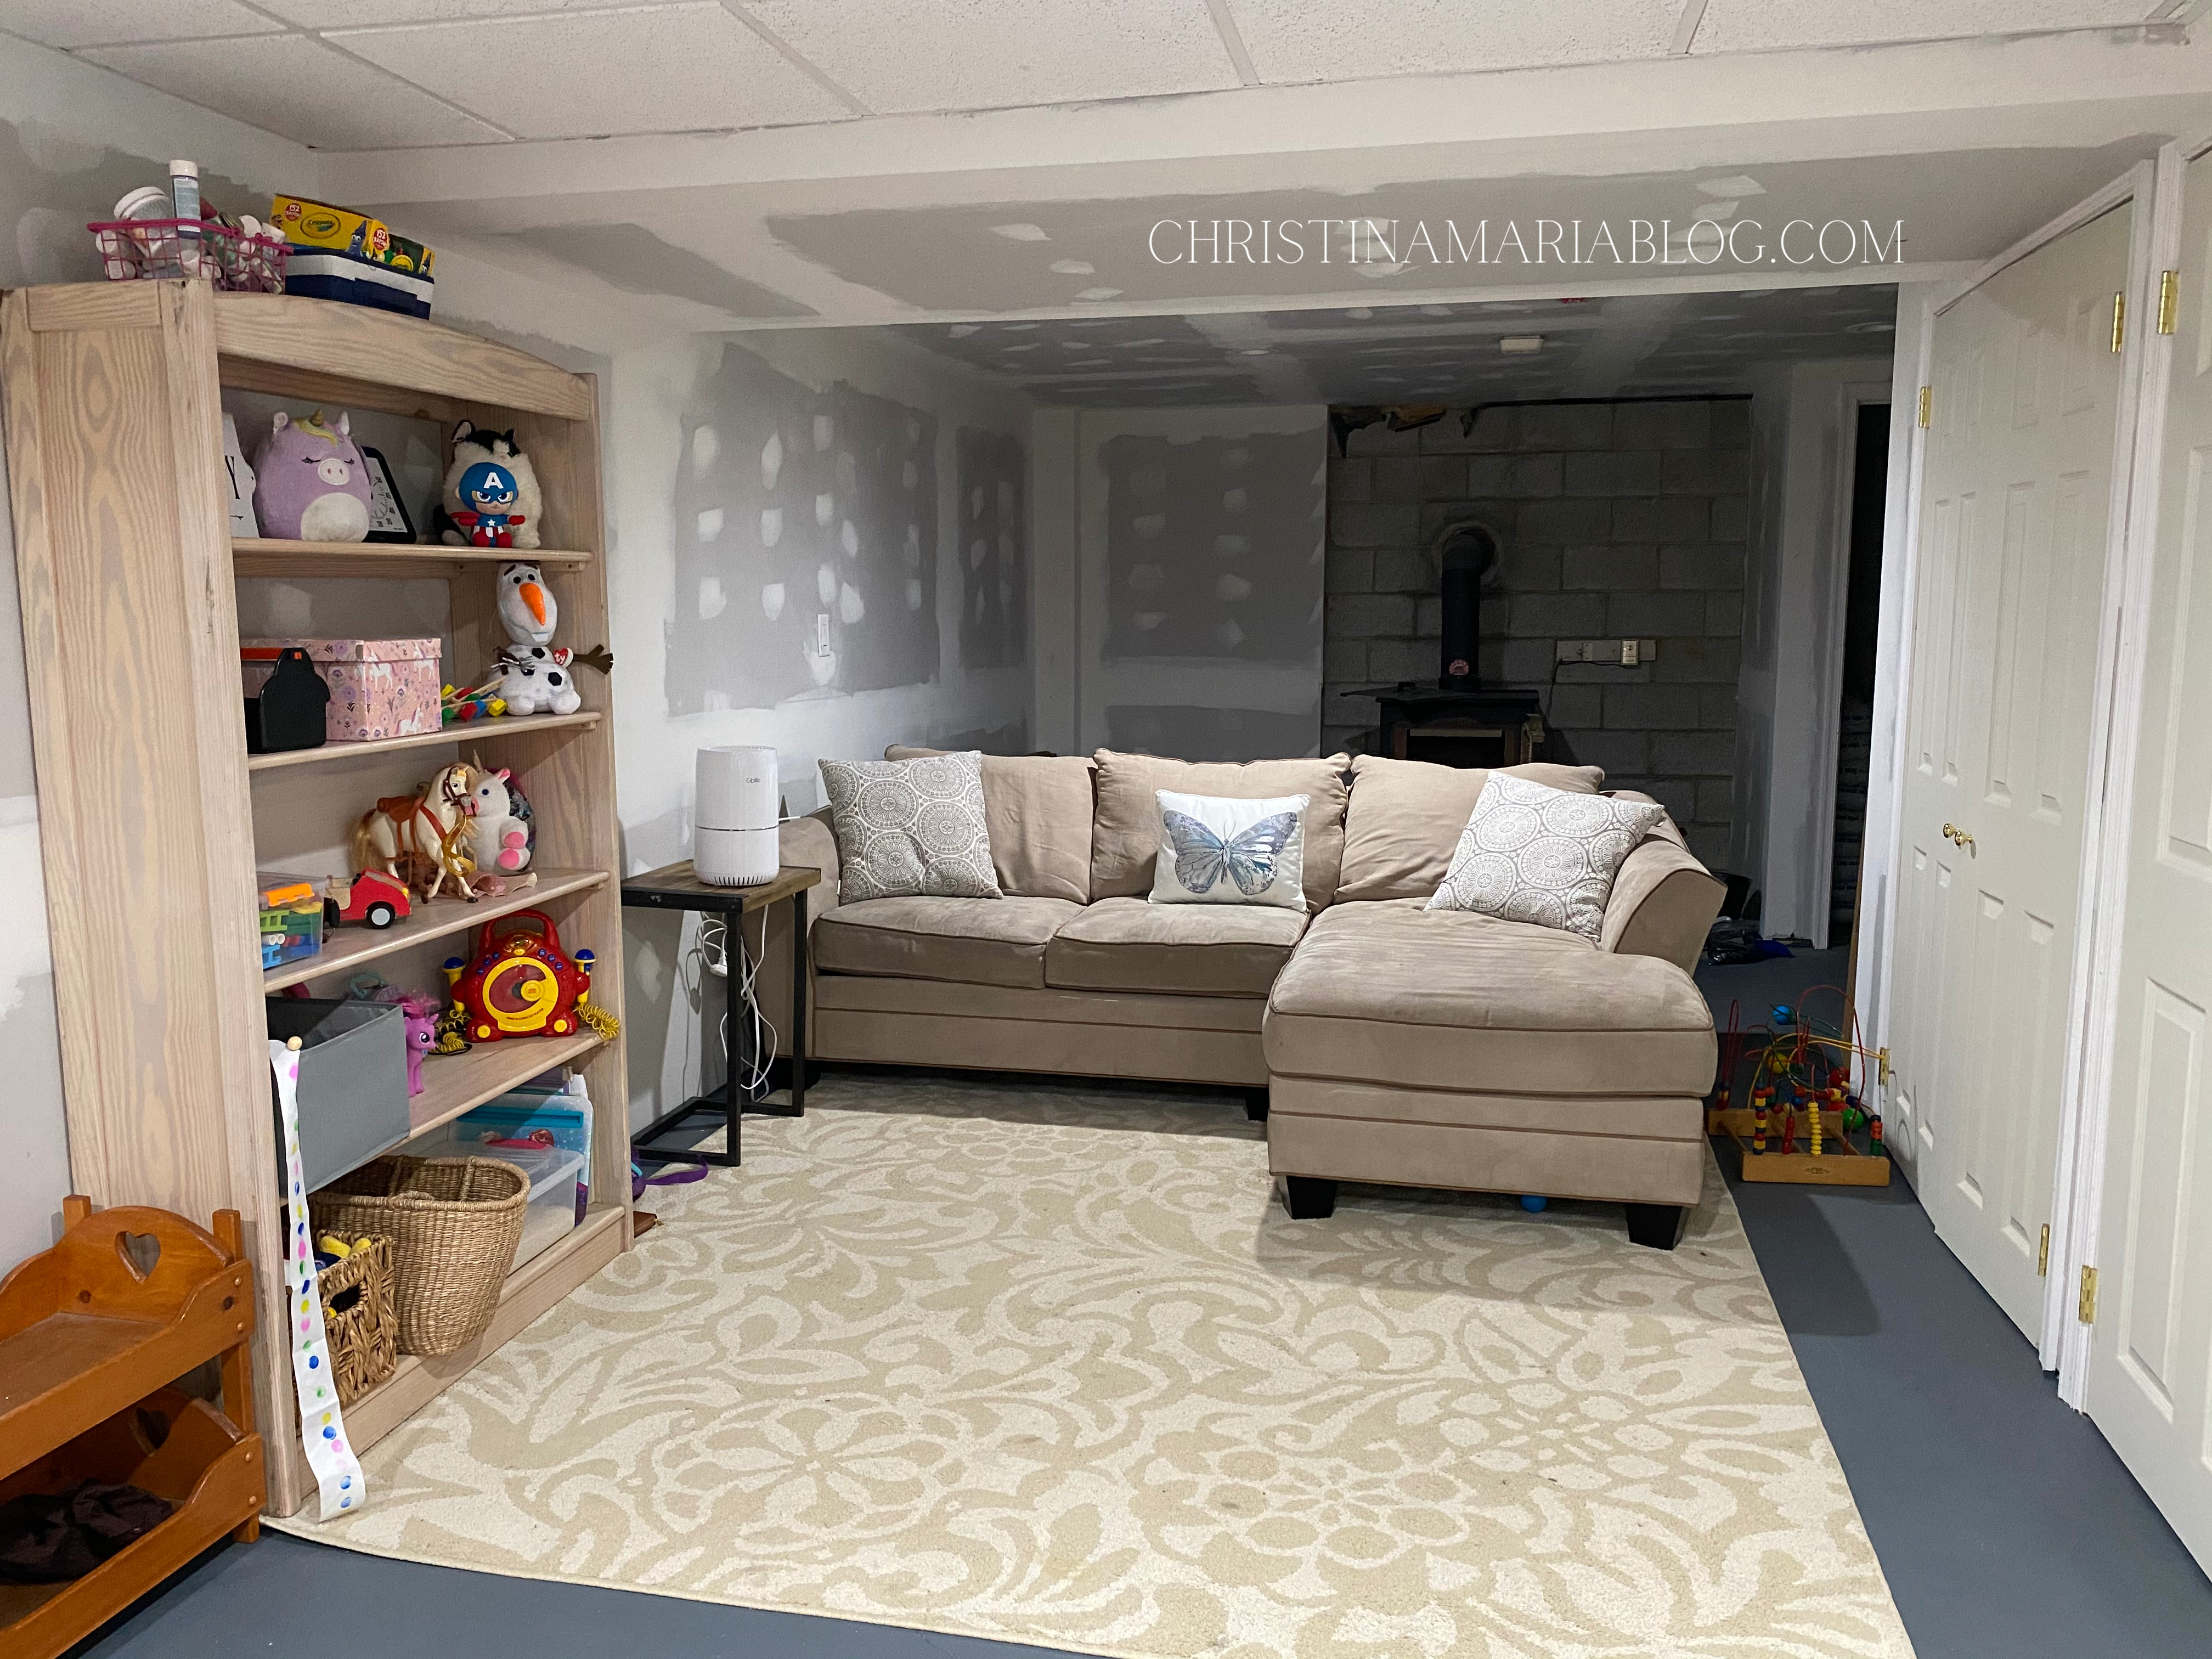
Painted basement floor:
I would LOVE to get a “real floor” down here someday. We’d love to do a good luxury vinyl tile down, BUT at the end of the day, budgets are a real thing, and we just didn’t have the money leftover in our budget to afford good flooring. We could have picked a cheap floor & put it down, but I didn’t want to regret that decision in a few years, so we decided to paint it for now and wait until we had the money to do better floors in a few years.

I got this porch paint from Home Depot – based on the reviews I could find online, it was far superior to all of the other products out there. I can’t fully recommend it yet since we haven’t really been able to use our basement yet. I had it tinted in a Behr color (the darkest gray they had that wasn’t black). It does have a blueish undertone to it – so if that’s something that would bother you then don’t choose this color. I thought it looked perfect down here!
The key for painting a concrete floor is in the PREP. We used this cleaner – it is so important to make sure you have the space cleaned properly before you try to paint the floors.
Rug & rug pad:
Since we chose to paint the concrete, we wanted to make sure there was still a soft surface for the kids to play on. I originally chose interlocking foam floor tiles – but then read the research on how they have some nasty chemicals in them. Do your own research – don’t just go by what I’m saying! But it was enough for us to choose to return the foam tiles we bought so we could find another option.
I found this rug pad (it’s 0.5 inches so it’s nice and thick) and got this rug on a really good sale, so it ended up staying within budget. The rug is a little big for the space, but works (It’s a 10×13). I personally love how the rug is a cute style, has some color, but doesn’t scream “PLAYROOM”…it goes with the other decor in our house!
Shop our rug & rug pad:
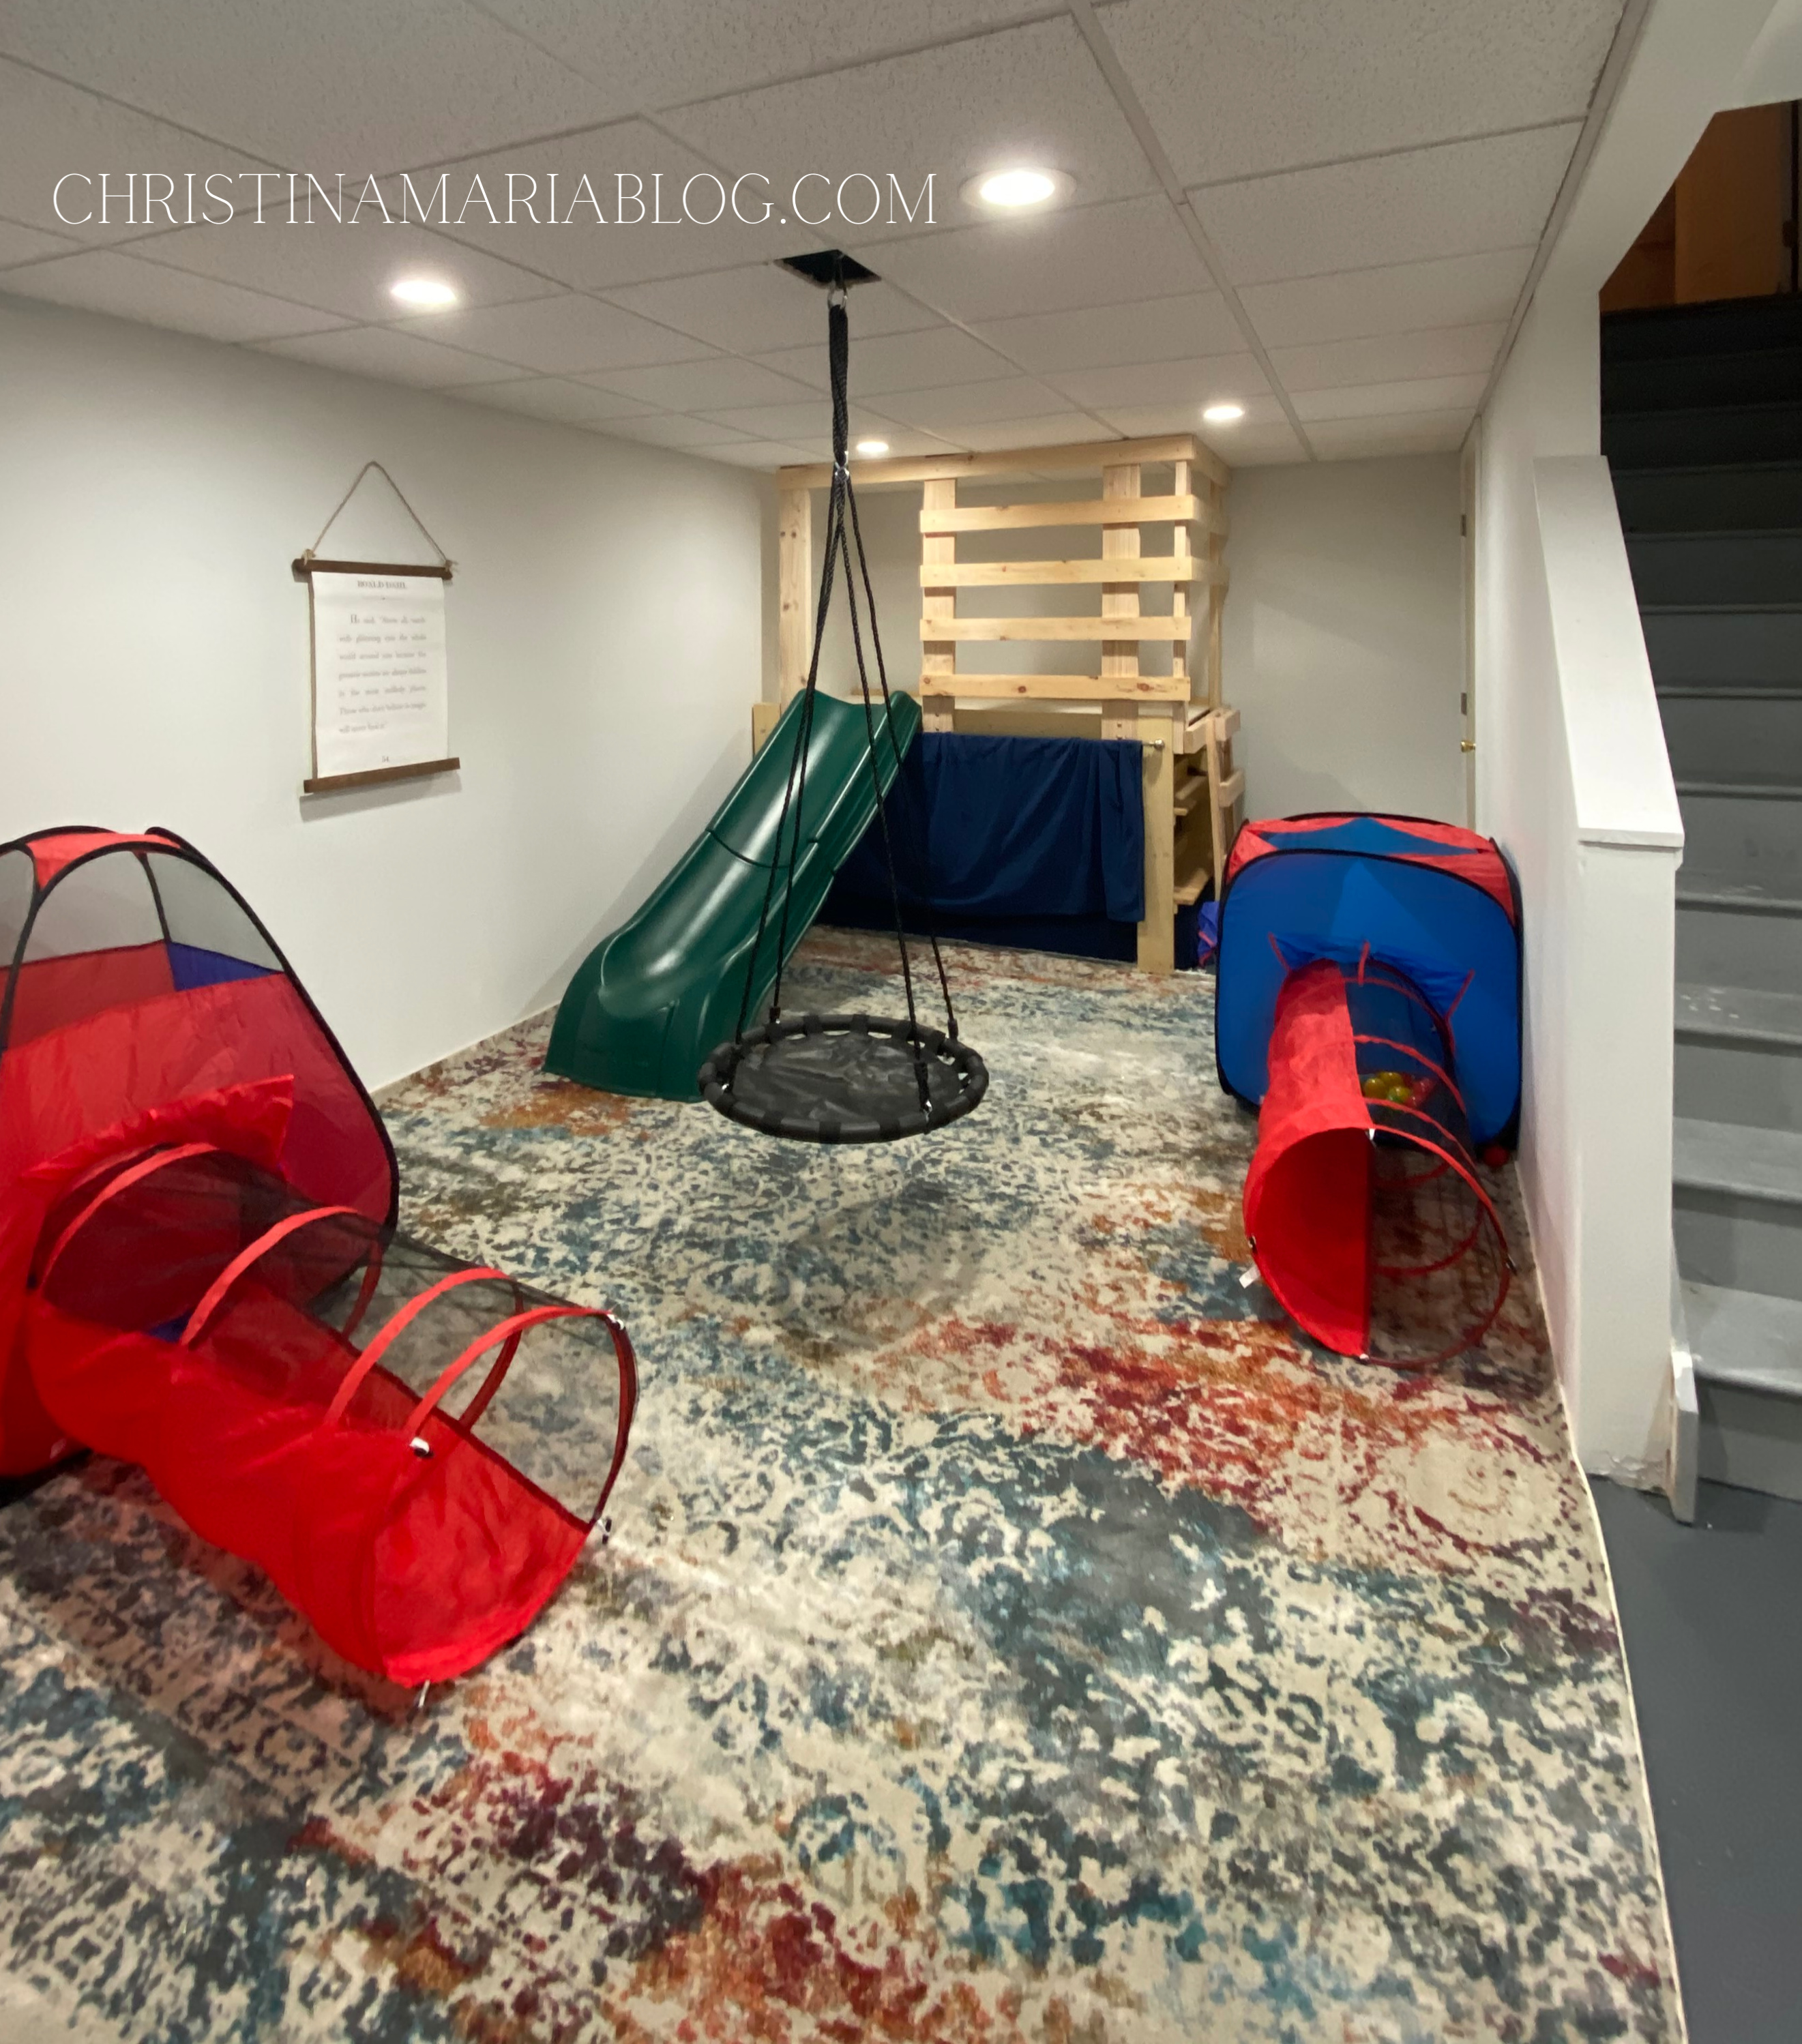
Tunnels, tent & ball pit:
Our last tunnel got destroyed by my kids. They played so rough with it! I wanted to get a new one, but didn’t want to spend a ton of money. We bought this one thinking that Heidi would be the one to get the most use out of it – but Isaac has actually been the one using it the most! So funny! He is so smart and always looks at how he can configure things differently…so that’s what he does all day in the basement.
I’m happy with this set! I don’t think its the highest quality (but the reviews are actually great) but I think its perfect for this space, and for kids that will probably be jumping into and on top of it daily.
What we still have to do:
We got the big parts of this basement makeover done for the big reveal on Christmas morning – but we still have more we want to do to this space!
- We ran out of paint and still need to paint the second half of the basement
- Paint the doors
- Paint the stairs (maybe a fun rainbow idea? Stay tuned!)
- Get a treadmill (buying off of FB marketplace) and put it behind the couch
- Paint the fort/slide structure
- Hang the curtains on the quiet play space
- Hang the stars the kids made in the quiet play space
This is the current quiet play space:
and here’s what the other side currently looks like…
Cost breakdown for our finished basement:
We had our handyman do a lot of the initial work for us. He added studs, did drywall, added two closets, made a wall and added a door to the unfinished side of the basement, and enclosed the washer/dryer and utility sink. He also did a lot of electric work for us as well as adding a soffit, drop ceiling to half of the basement and a drywalled ceiling to the other half of the basement (that didn’t have pipes or wires behind it). These numbers are rounded & not exact.
- Handyman work: $7300
- Floor paint & cleaner: $70
- Rug & rug pad: $300
- Fort & slide structure: $275
- Swings (we bought 2): $70
- Ball pit & tent: $50
- Paint: $100
- Rug #2, couch & bookshelf: FREE
TOTAL COST: $8,165
Obviously that’s a lot of money, and it’s definitely not a cheap “present”! And we don’t typically spend that much for Christmas 😅 BUT the majority of the cost was the actual finishing of the basement. We were able to do the other parts of the playroom on a budget, and we’re so happy with how it came out!! The cost for a finished basement can vary SO MUCH – obviously we didn’t do a floor- that would have added at least $3K more to the project. We also didn’t have our handyman paint anything, so we tried to save money where we could. Also – square footage is a big variable factor too! Our basement is 35 feet long, so we had a decent amount of square footage to finish off.
Finishing off this basement was HUGE for us – it adds so much square footage to our home!! I really see this finished basement transitioning and flexing with us through the years as the kids grow – and now we have a great foundation we can use forever in this home!

Awesome post! Love the reaction of the kids! Pure excitement! You guys worked hard on this and made great use of the space. You will have many years of pleasure from this! A job well done!
It’s fantastic!! All of your hard work paid off to get a reaction like that!! I’m so impressed how many ‘features’ you were able to get into the spaces!
And Heidi…she was FROZEN!! She looked so cute just standing there, taking it all in!!!
Congrats on such a huge project!!
Aww crying watching this!! So so sweet! Their reactions I know were worth every penny and all the work y’all put in to it. Merry Christmas!! It looks awesome!
Wow, what a great play space! I know your children will enjoy it for many years to come. Just a little advice from an older mom who has had one of my children fall down the stairs TWICE, put a heavily padded stabilized rug at the bottom of the stairs – better safe than sorry! Love your blog and your good ideas!
This is darling! Loved seeing the children’s excitement…and your dog right in the mix. So sweet!
aw thanks Kristine! Mickey is always right there with us – it’s like he’s always been a part of our family! 🙂 And thanks- it was so fun surprising them!!
By any chance do you have the measurements for the bed and the fort? I’m thinking about making something like this for my son but trying to find some sort of guide. Thanks!
I don’t have measurements, sorry! It was a loft bed originally so we built it up from there – it fits a twin mattress underneath (and would on top as well)
Love this! what kind of ceiling does your basement have? I want to hang a swing like that in ours but ours don’t have like 2X4’s they have like plywood I-beams? So I’m wondering if that is what you had, how did you secure the swing to make sure it would not fall?
LOVE THIS! I’m working on something similar! Do you mind sharing how you hung the swing through the drop ceiling? Our rafters are about 12″ higher than our drop ceiling, so I’m having a hard time figuring that part out. I have a few ideas, but it seems it’s been a year since you did yours, so if yours is still attached, I’d love any advice you could give! : )
Amazing!!. How did you hang that swing. We have exactly the same ceiling and clueless how to hang a swing in our basement for our kids
We cut a hole in one of the tiles on the ceiling, and then attached it to one of the wood beams that run under our floor 🙂