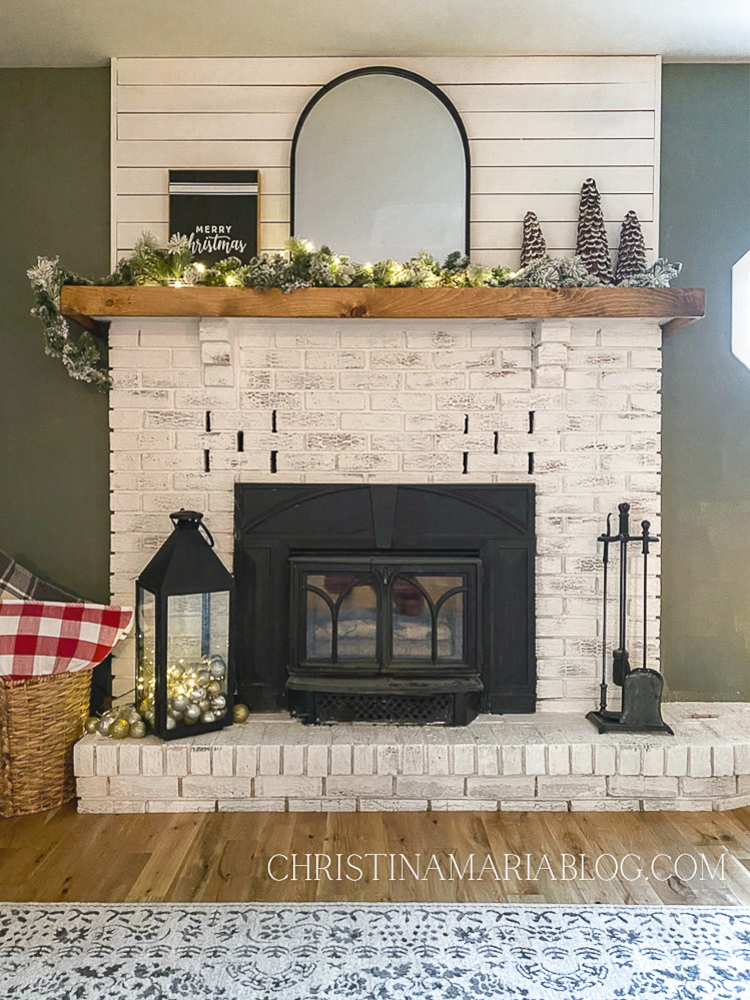
We just finished our fireplace makeover and we are LOVING the big impact it makes in our living room now! And it didn’t cost a ton of money either – come see all the details of this DIY makeover! This post contains affiliate links – full disclosure here!
This post has been a long time coming…I documented every step through video for you guys, and put it all together in this YouTube video – I hope it’s helpful! I also included important information from the video down below, so if you want links to products and more info – keep scrolling!
DIY fireplace makeover:
I made this video about the first part of the limewash makeover…and you can see why I really didn’t like it for a while! I really thought I was going to have to wash it all off:
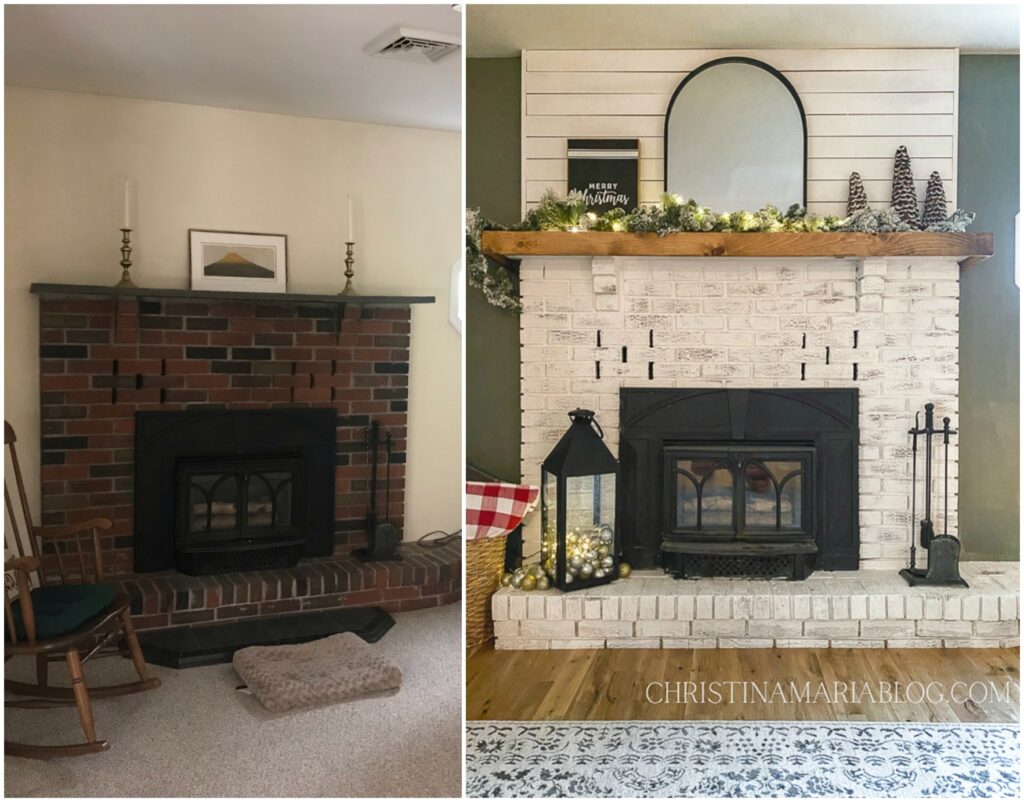
Let me start out by saying that the fireplace wasn’t BAD to start. It was in good condition & cozy for sure. But it didn’t feel like “us”. Also – it’s not old brick, so I didn’t feel bad limewashing it. If it was old brick I would never cover it up! But 80’s brick isn’t as much of a treasure 🙂
First up – lime wash the brick fireplace
OK so let me tell you – if you watched that video, then you saw that I wasn’t in love with the lime wash at first. I didn’t love the funky crackle texture coming through, and it just was falling flat to me. Thankfully I knew I could wash it off within a week of applying it, so that really helped me keep going! After pitching allllll the ideas to my Instagram friends, I decided to distress it strategically to give it some visual interest. I wanted to stay away from the “cheesy distressing” – I’m sure you know what I’m talking about. But when it was just flat white, the brick & deep mortar lines looked too…perfect. Kind of like 80’s brick. Again – didn’t love any of that!
I used allll the tutorials from Romabio paints – they have so much good information on their websites! I’ll put a video of theirs in here so you can see how they advise to apply and distress the finish. I figured I’d just share their video instead of making my own since it was exactly what I did!
After the brick was lime washed, as I shared in my video above…I didn’t love it!! Ahh! But I was HOPING that when I finished the rest of the fireplace, it would all come together nicely.
Adding a faux chunky wood mantel:
I show exactly what we did to add a faux chunky wood mantel in this video – and also go on to explain the next step where we used horizontal boards to extend the fireplace to the ceiling:
This faux chunky mantel really turned out better than I expected. It was kind of a “make it up as you go” project, and I really loved how it turned out!
NOTE: If I were to do this fireplace makeover all over again, I’d choose wider pieces for the front & sides. I love the size we have and will not change it, but it’s hard to make it too big! It would look awesome if it was a few inches wider.
If you love a rustic look, then try to distress the wood before painting! You can knock on it with a hammer a few times, drag some tools on it, or make “worm holes” with various size nails.
In the video, I talked about the importance of using a wood conditioner before staining. IT IS VERY IMPORTANT and I’ve learned this the hard way for sure! I have a whole post here about the right way to stain wood – I learned from the professionals for this post!
Extending the fireplace to the ceiling:
This was a bigggg game changer in this space! I posted about our living room makeover ideas a few months ago (see the original design board here), and I used a white brick fireplace in my vision board. I didn’t even think about doing this until after I put that board together! It really makes all the difference to add those horizontal boards.
Fun fact: This is not shiplap! Most people will call it shiplap, but TRUE shiplap is boards that are notched and connect together with a little space in between the front ends of the boards. These are not notched boards, they’re just plain straight across pine boards from the home improvement store. The more you know!
Skip to 2:02 in the below video to watch how we did this part of the process!
Fireplace before and after:
I want to say one more time – there was nothing wrong with our fireplace before. We just didn’t feel like it was “us”. If you have a brick fireplace like this and love it – PLEASE don’t change it! You do you!


Beautiful transformation! 🙂
It looks fantastic! Just gorgeous.
Thanks Shelia! We’re so happy with how it turned out!
looks so good. Could you please tell me the width of your fireplace?
I’m looking to replace my builder quality fireplace with bricks on bottom , but feel that the width of my fireplace (82inches) would look too over whelming.
Any thoughts?
Thanks
I really love how you painted the brick Christina, great color, and looks easy to do, nice job.