Learn how to make this adorable DIY mason jar holder in a few simple steps. This budget friendly project will bring farmhouse style into your home decor!
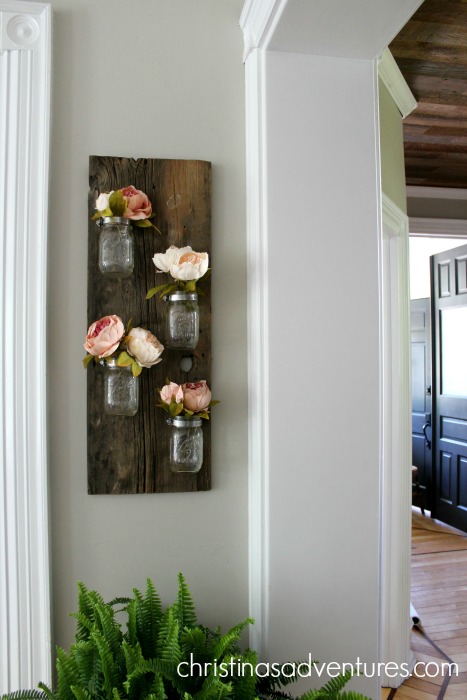
I’ve been meaning to make a mason jar holder for my home for such a long time now. Now that I’ve made one, I want to make different versions of the same craft for every room in my house! This is a great way to add character to any room or blank wall in your house:
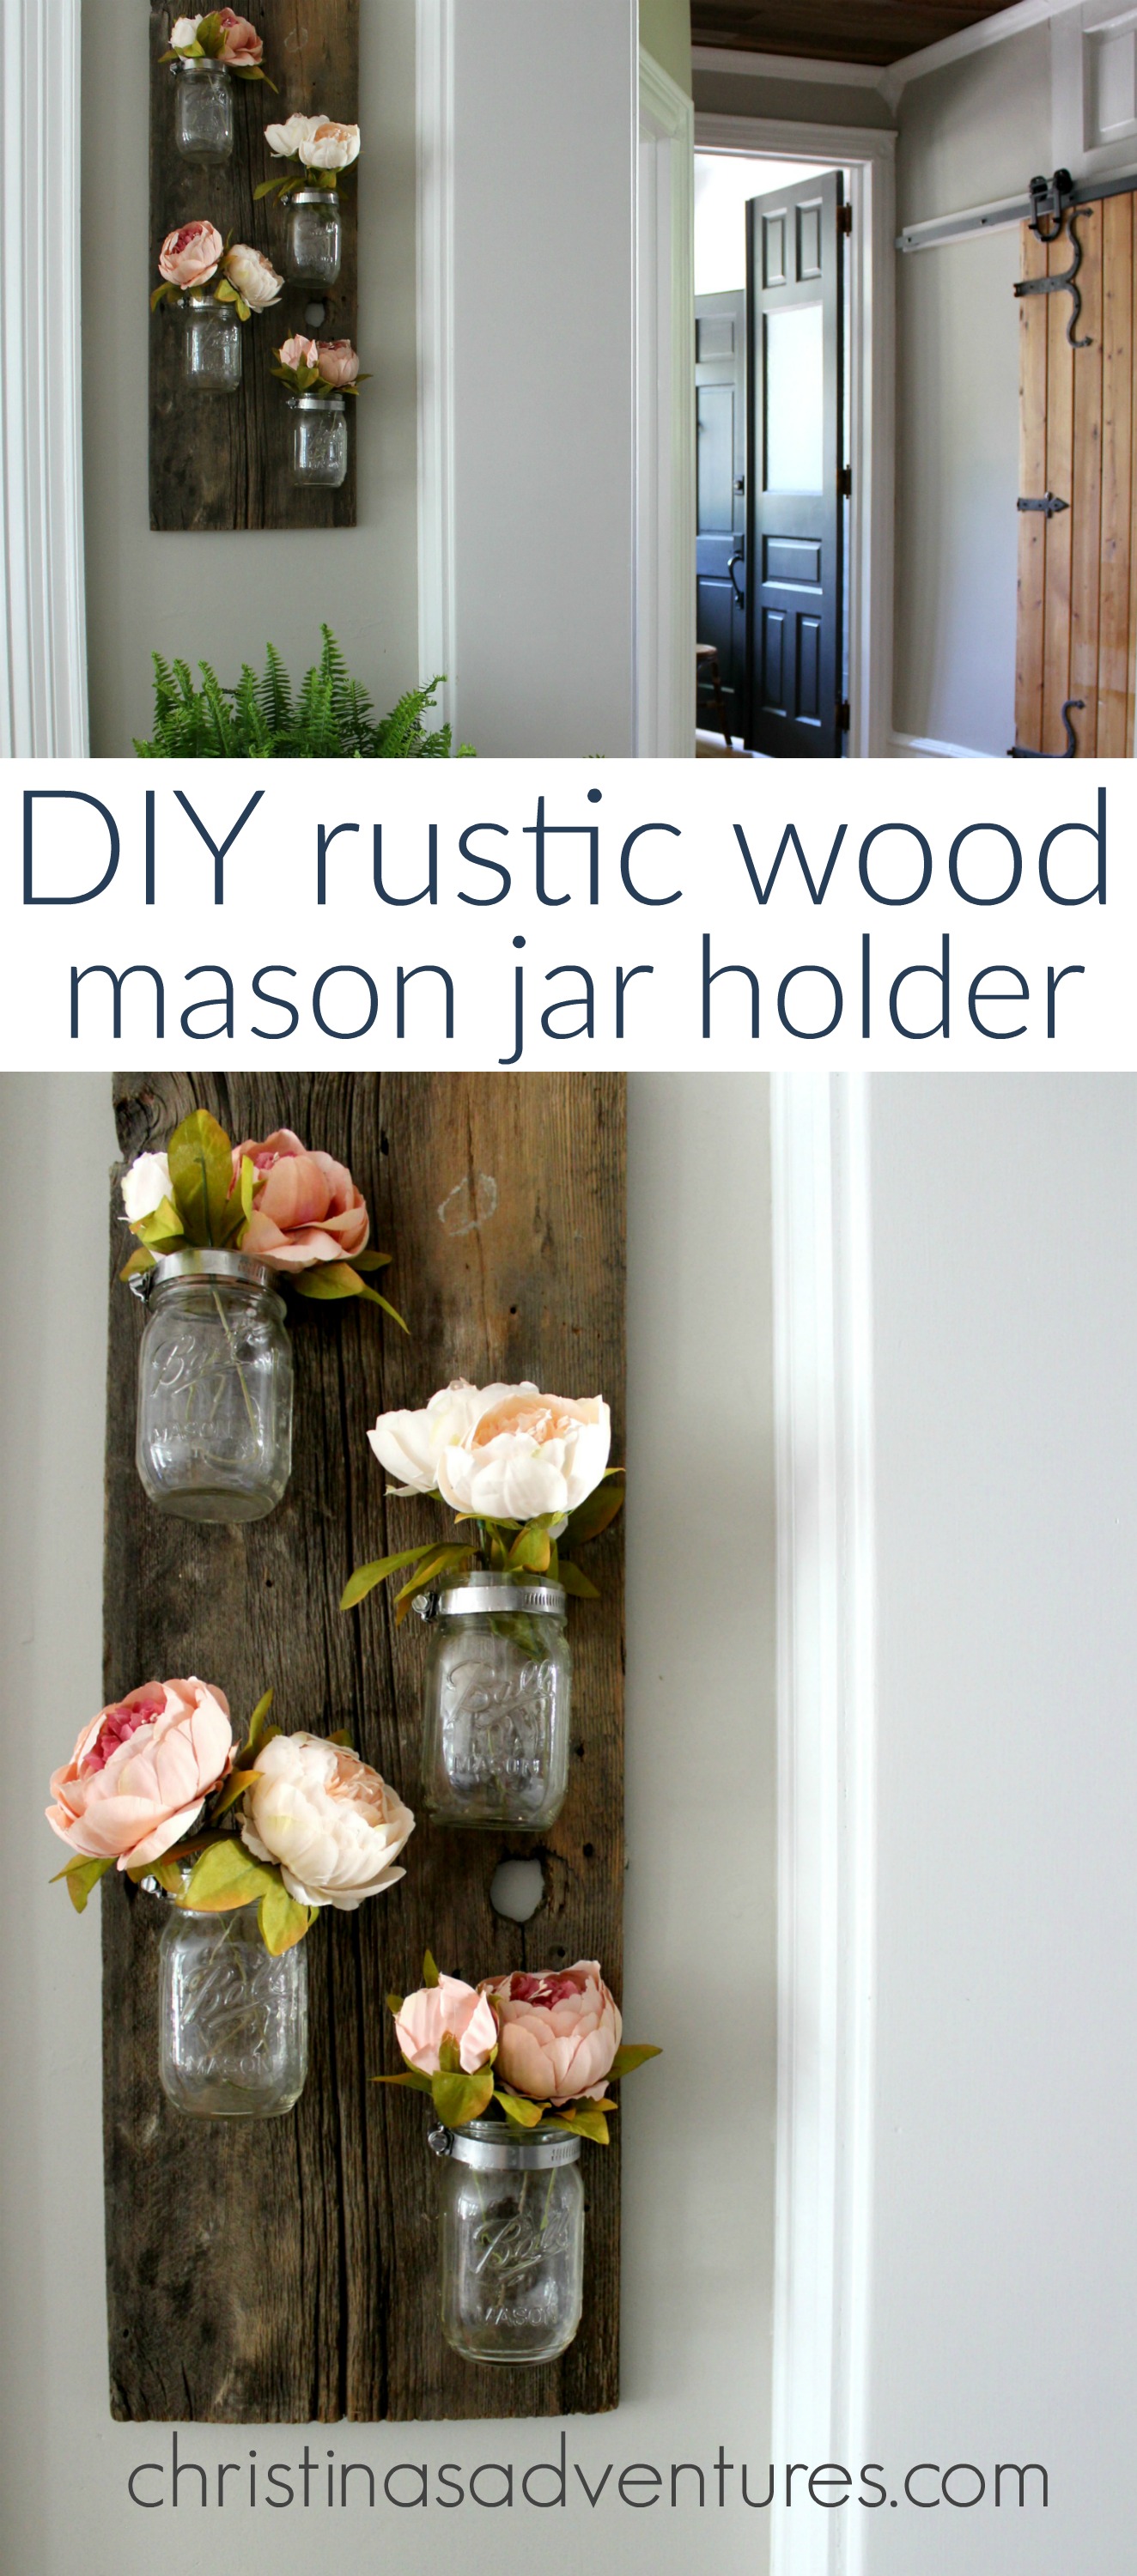
How to make a mason jar holder:
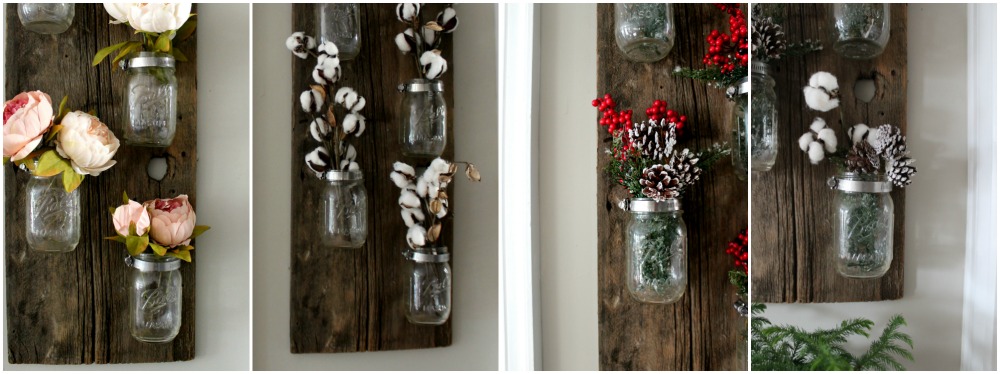
It’s decorated for spring/summer here, but it’s the BEST to decorate through the seasons. It’s so simple to change out for each new season!
Pin this here if you like this tutorial!
It’s really pretty simple and inexpensive to make too! Here’s a breakdown of how we made this project:
What you’ll need (affiliate links provided for your convenience. full disclosure here.)
- mason jars
- wood
- worm gear hose clamps
- drill
- screws
- artificial flowers (these are the ones I used)
I made a video to share my process – keep scrolling for pictures & text instructions!
I got my wood slab for $5 at a local reclaimed wood place. It’s the same place we got the chunky wood for our open shelving in our kitchen – love them!
I knew this wood was perfect, I really wanted something with character.
I also am having a moment with peonies right now – I thought these artificial ones actually looked pretty good! And they’re relatively inexpensive – win!

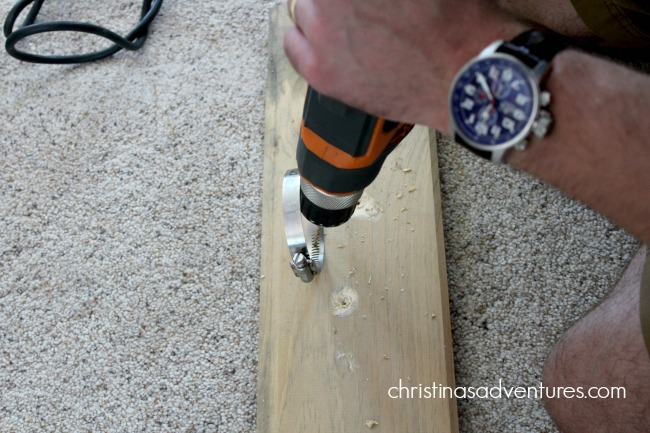
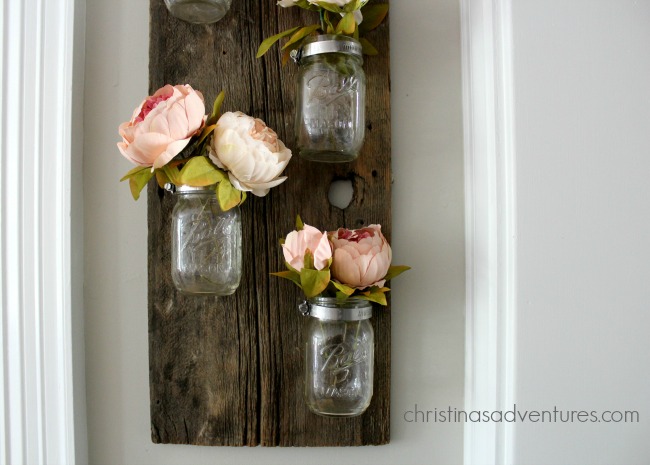
You’re also going to want to get some “worm gear hose clamps“. I know – weird. But they’re also inexpensive and can be found online instead of searching through the hardware store – win again! Just make sure you get the right size – I got ones that were too big at first…so annoying.
OK now you’re going to want to mark where you want your jars to be. I didn’t go crazy with measuring – I just eyeballed it. Make sure you look at how this project will look with the flowers in the jars – you’ll have to account for the height of the flowers on the top jar when you’re marking where the jars should go.
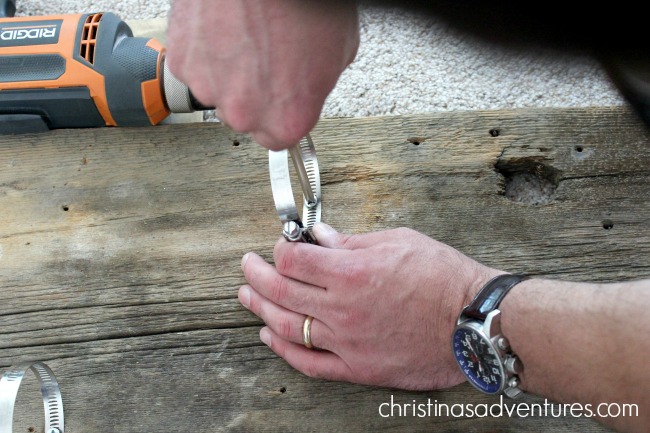
Next, you’ll take your drill and pre-drill a hole in the clamps. Keep the piece that tightens the clamp on the left with the screw easily accessible as shown:
Once they’re pre-drilled, you can either drill or put the screws in by hand. We opted to do it by hand because our wood was soft enough, and it was easier with the angle we had to use:
Finally, place your jars in the clamps (from the bottom) and tighten them with a flathead screwdriver. Add your flowers…
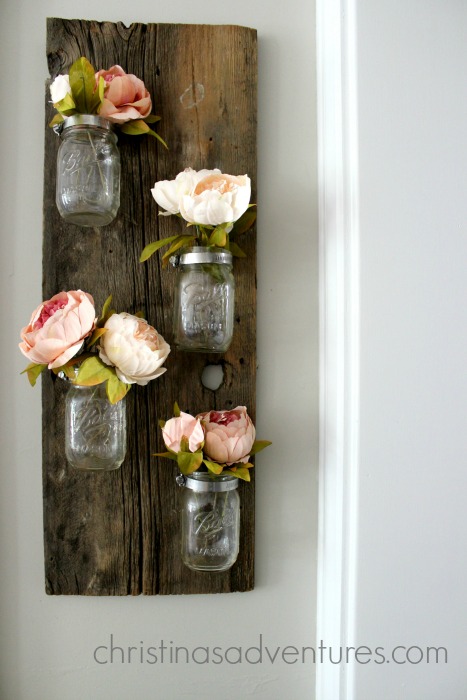
Admire your work! Thank goodness these are artificial flowers – this will look good for a long time, even though I have a black thumb!
There’s a lot of ways you can customize the look of this project in your home! Here are some faux flowers that could look great in these mason jars as well (affiliate links)

And I just had to share – look at this little cutie who photobombed my picture:
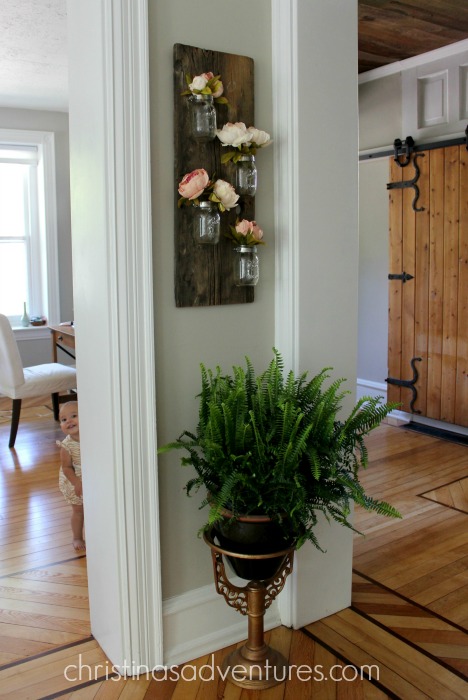
see more pictures of our hallway makeover here
I love that it’s SO easy to decorate for each season! Here’s what it looked like decorated for fall:
Got a blank wall that could use some character? Let me know if you’ll attempt this project – I’d love to see the finished product!
subscribe to my free e-mail newsletter at the bottom of the post for more simple DIY project ideas!
If you like this idea, please share with others by pinning this image:
Like this post? You’ll also like:

I have a perfect place for this or possibly places for a few! Could you please tell me the dimensions of the wood slab you used?
What size clamps did you buy? Love this idea!
What size clamps did you buy? Love your work!!
Thank you! If you look at the list for materials needed, the size that I linked is the correct size for the jars used 🙂