Our farmhouse kitchen in our fixer upper house got a BIG makeover three years ago. Come see what it looks like today, how things are holding up, what things we’d do differently and what we’re still in love with today. This post contains affiliate links – full disclosure here.
It’s hard to believe it’s been over three years since we did our big DIY farmhouse kitchen makeover in our fixer upper! Whenever I share pictures of our kitchen on Facebook or Instagram, I get a lot of questions about how we like things and how different elements have held up over time.
Our farmhouse kitchen – three years later
So to make the story short – we’ve added lots of little things, done one big statement wall, and changed out a few minor pieces. But the major pieces of the kitchen have stayed the same and we truly love them! Keep reading for a full update on each element of our farmhouse kitchen:

Leathered granite counter tops:
One of the biggest questions I get asked is about our counter tops! The short answers about them:
- YES we love them
- YES we would choose them again
- NO we do not have to do anything to maintain them
- NO they do not show a lot of dirt
- YES they’re great for a family
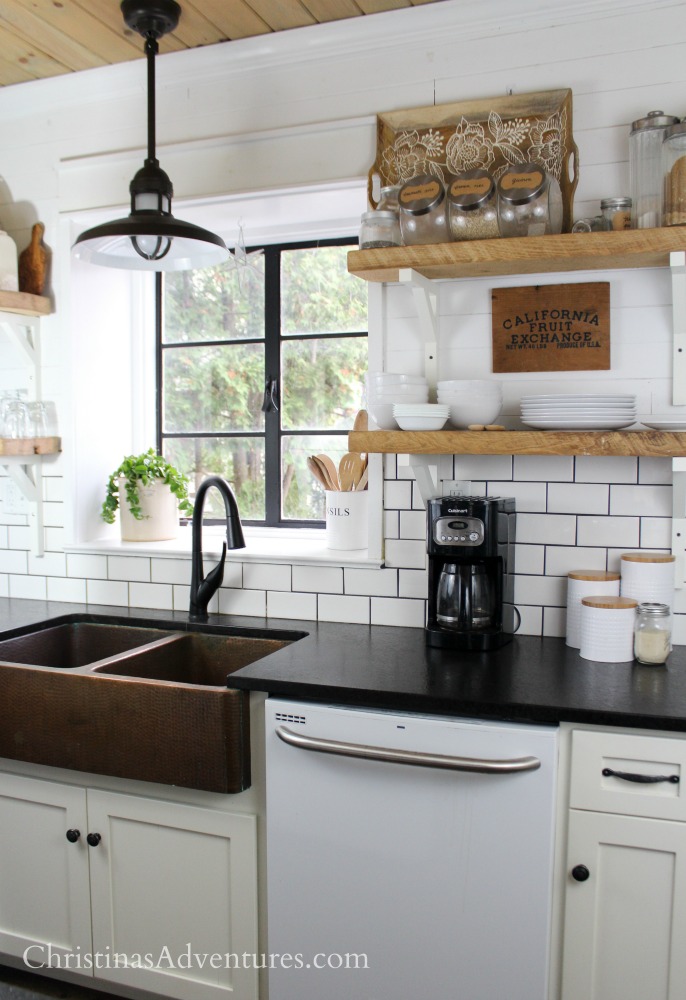
White subway tile backsplash:
This is still so classic to me, and I’m glad we went with something this traditional instead of trying something a little different. I also love the dark grout because I am NOT a meticulous backsplash scrubber.
We actually did a smaller version of this subway tile in our upstairs shower when we did our big bathroom makeover – it was easier since we didn’t have to lay each tile individually.
You can read my whole post about where to find our affordable tile design here.
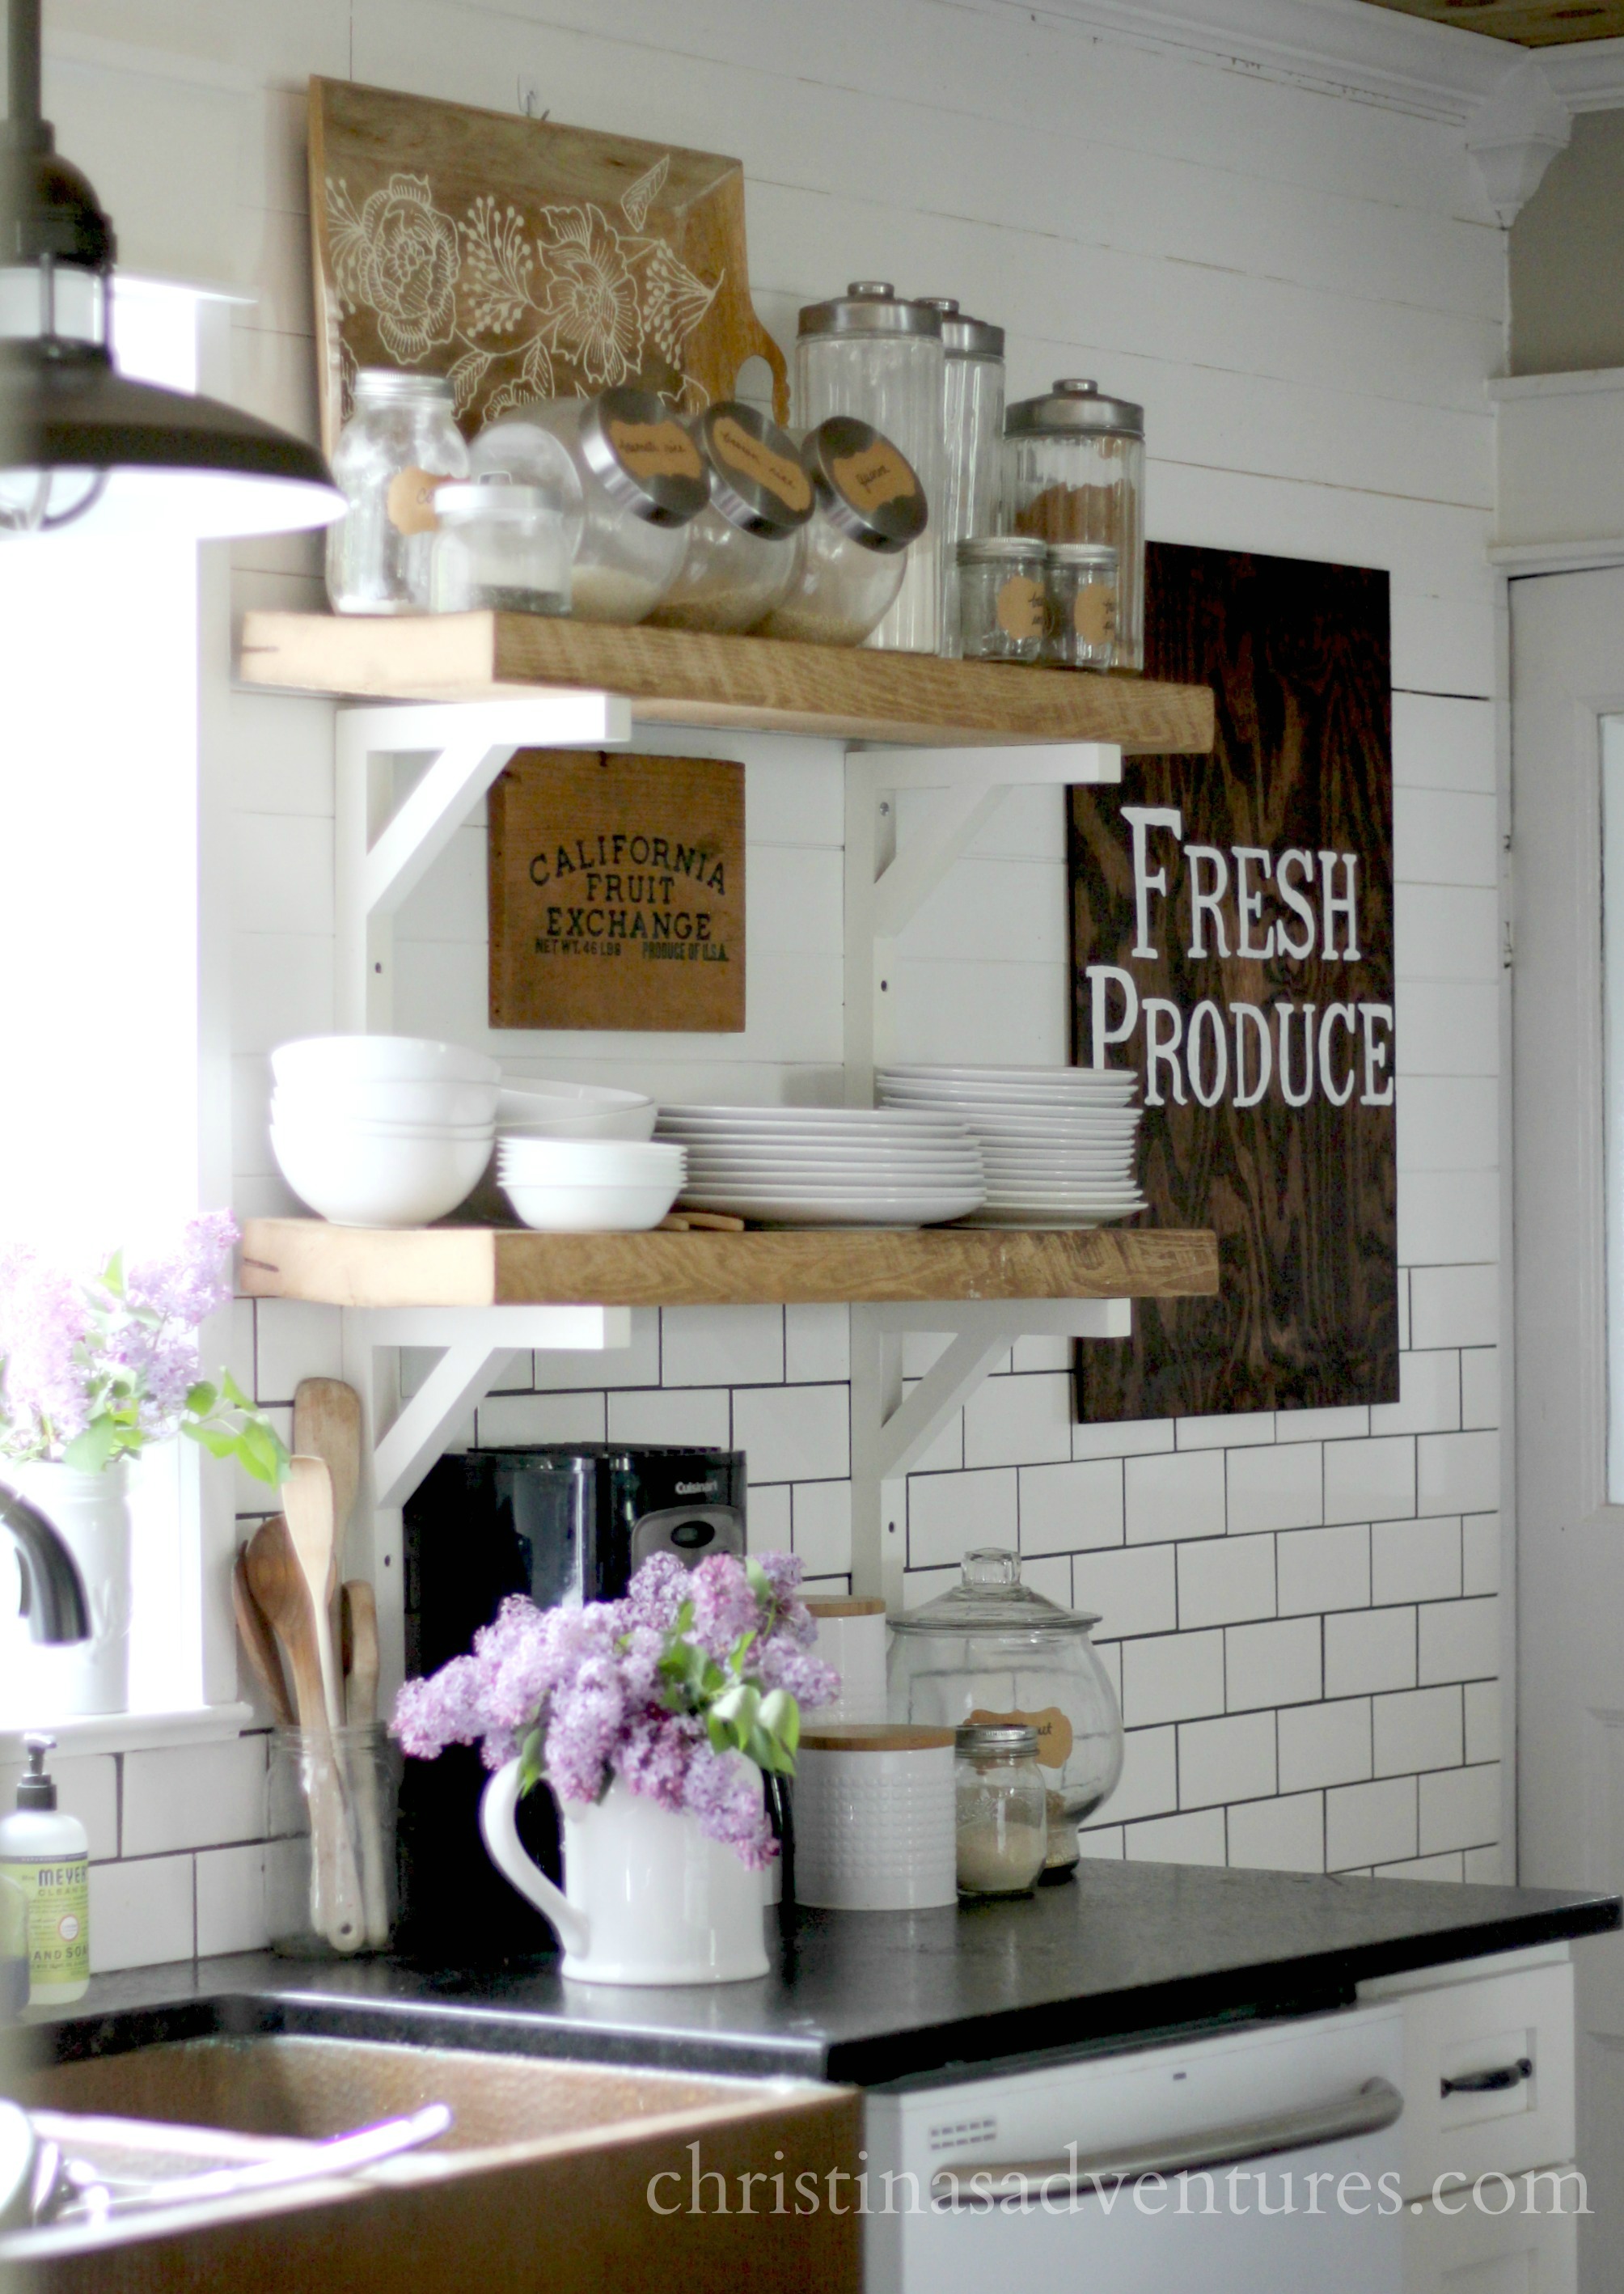
Reclaimed wood open shelving:
I am so glad we spent a little bit extra and put in our reclaimed wood open shelving. The weight of it adds so much more to the space than if we had just used wood from the hardware store.
I get asked a lot about our brackets – sadly…they’re no longer sold. They were originally from IKEA and were such a great find because they were so inexpensive. They were also a pain to install, because things from IKEA can tend to be that way – ha! But I’m so glad we got them when we did!
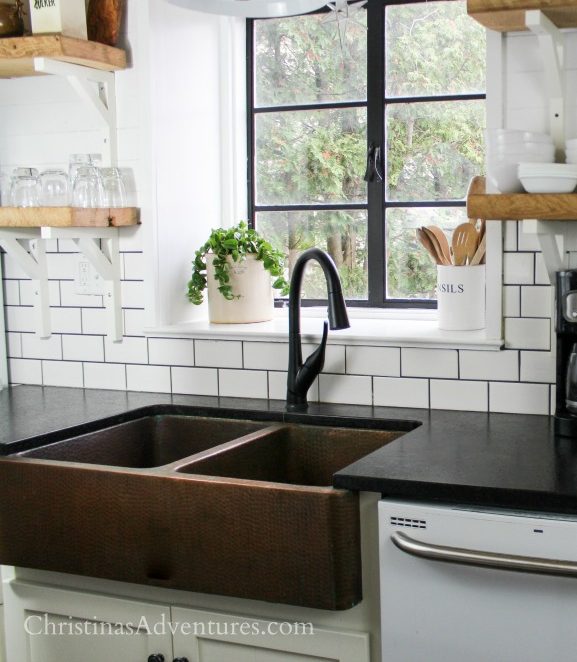
Hammered copper farmhouse kitchen sink:
This was my “splurge” for the kitchen (it really isn’t that much more expensive than a traditional white farmhouse sink though). It was a little bit of a risk, and not a lot of people were putting them in a few years ago. I get SO many people asking about our copper sink! Here’s my short answers to hold you over before I write my full comprehensive pro/con post:
- YES we love it
- NO it does not keep the shiny copper color if you don’t clean/polish it every day
- YES we like the look of the antiqued copper color (like above)
- YES it shows staining
- NO I do not think you should buy one if you’re not OK with it looking aged/weathered over time
- YES we would buy it again
- I definitely recommend getting a sink grate to help protect the bottom of your sink – this is the one we have.
Here’s some affordable options for copper sinks with good reviews for you to check out or purchase:

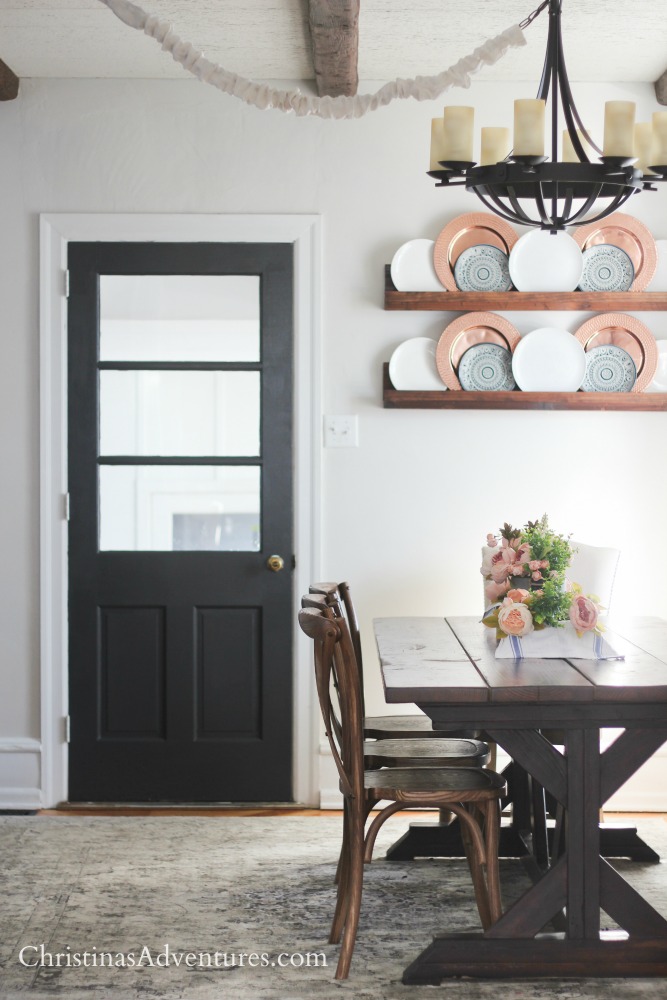
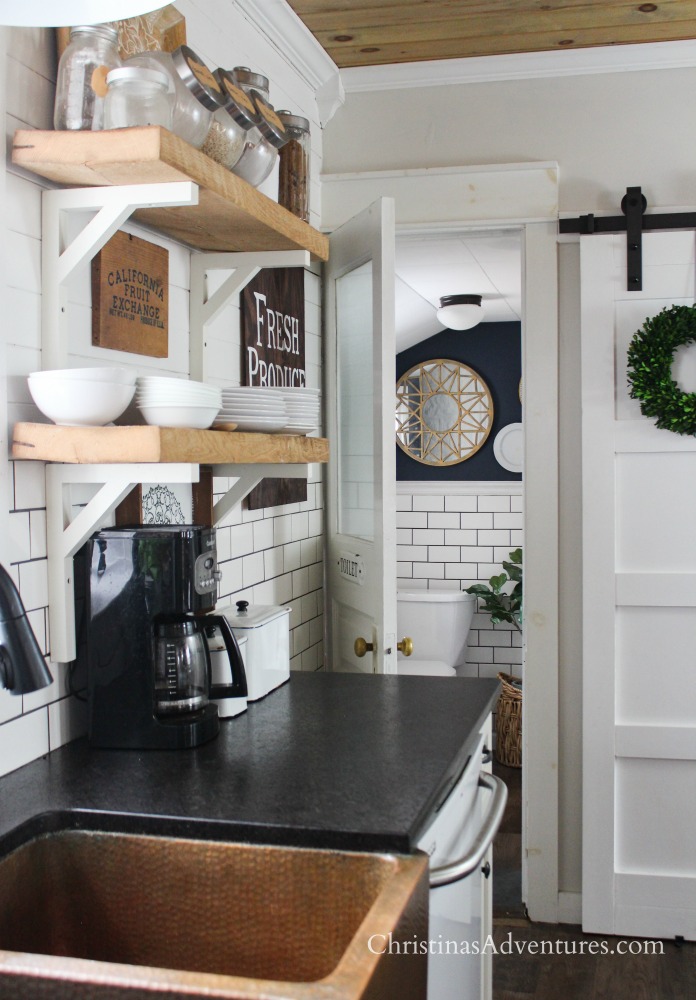
Painted interior door:
While the one side of our kitchen stayed mostly the same, we changed the other side of it pretty drastically. One of the biggest changes for the smallest amount of money (it was free!) was when I painted our interior door. I love this change SO much – it made all the difference in this space! It proves that you don’t have to spend a ton of money to make a big impact in your home.
Come see what paint color we chose for this door here.

Brick veneer wall:
My obsession with all things brick reached a whole new level when we installed this DIY brick veneer wall in our kitchen/dining area. Man, I LOVE this change! I always struggled with decorating above our farmhouse kitchen table, and nothing ever looked quite right. BUT that all changed now that we put in this statement wall! It was a big project and my husband never wants to do anything like it again – ha! But we’re thrilled with how it looks.
We did the same wall in our bathroom upstairs and I wrote alllll about how much it cost, where to buy it, how to install it, etc. Come read all about that here.

Sliding barn door for our pantry:
You may remember we made over a $10 thrift store hollow core door into our barn door for our pantry, and I’m so glad we did! The only thing we may add is a lock for this door – it was a pain when my daughter was 1-2 years old and would just help herself in the pantry. Since we’re adding baby #3 soon, we may have to revisit this idea in a few short months!
Other than that, we’re really happy with how it’s held up and how it functions for our family. Click here to read about how we made and installed this door.
Here’s the barn door hardware we purchased – the BEST price we’ve found by far (and we’ve been really happy with it!)

Our Amish cabinetry:
We are SO happy we went with our Amish cabinet maker for our cabinetry. People say that sounds too expensive for their space – but I urge you to get a quote! We got a much better product for LESS money than we could get at the big box stores.
We love our Amish cabinetry so much that we had the same cabinet maker design and install our bathroom vanities – come see those here.

Modern farmhouse kitchen paint color:
The other thing we changed about this space was the paint color on the walls! Honestly, our kitchen is super dark, and the old color just didn’t read the same way it did in our old kitchen at all.
We changed the paint color to Revere Pewter – lightened 75%. We have Revere Pewter at full strength in other places in our home and we love it, but it was too dark for our already-dark kitchen.
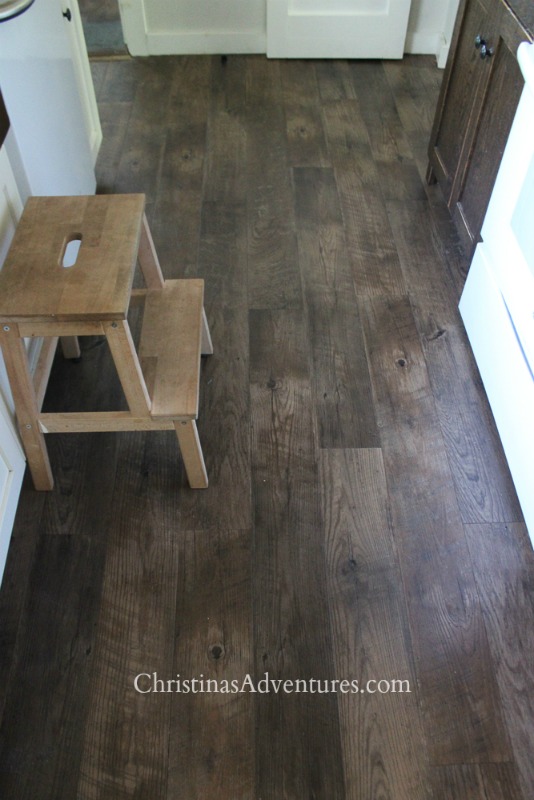
Luxury vinyl tile flooring:
I am so happy to say that we still love our flooring. We used this flooring in our previous kitchen, then this kitchen, and we also used it in our upstairs bathroom! This product is supposed to be really good for high traffic areas that get a lot of moisture.
The luxury vinyl tile we used is planks that are not notched together. We installed them ourselves, and it is absolutely something you can do. They were installed with glue onto a leveled plywood subfloor.
We would 100% re-install this flooring again today if we had to make the decision again.
See more about our luxury vinyl tile in this post.
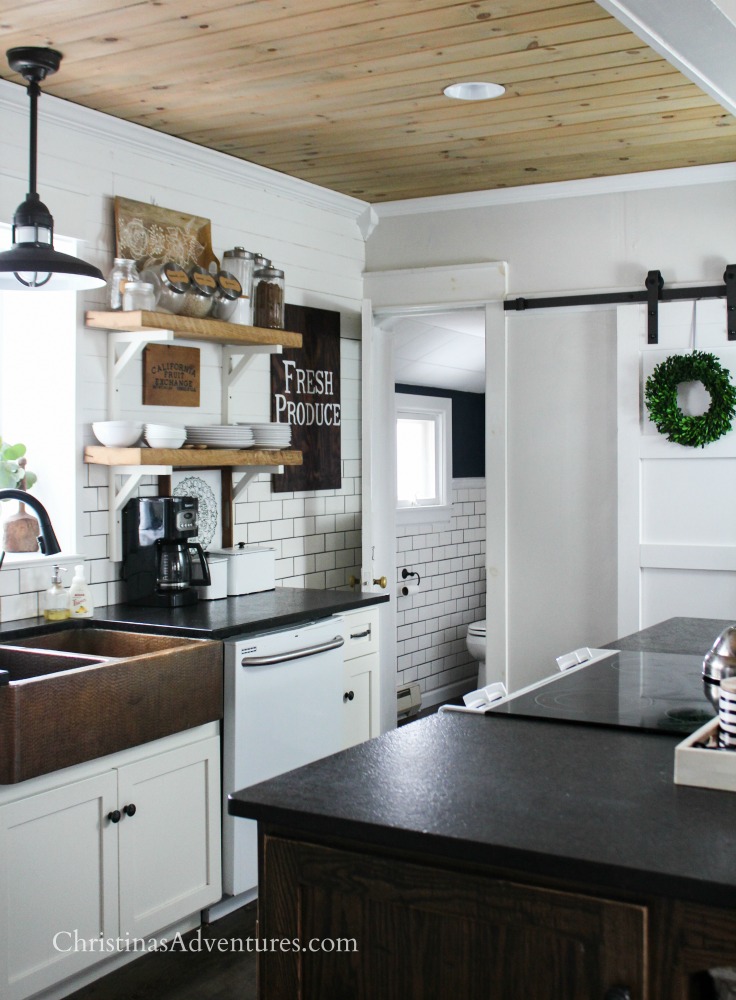
Wood planked ceiling:
Oh how I love our ceiling! It used to be a terrible drop ceiling that we ripped down. While we were renovating our bathroom last year, we had some water issues and had a few leaks on top of our planked ceiling. It held up really well to the water, and we were able to open it back up relatively easily because of the way we had installed it. It looks just like it did on the day that we built it!
You can see the whole process, stain color, etc in this blog post here.
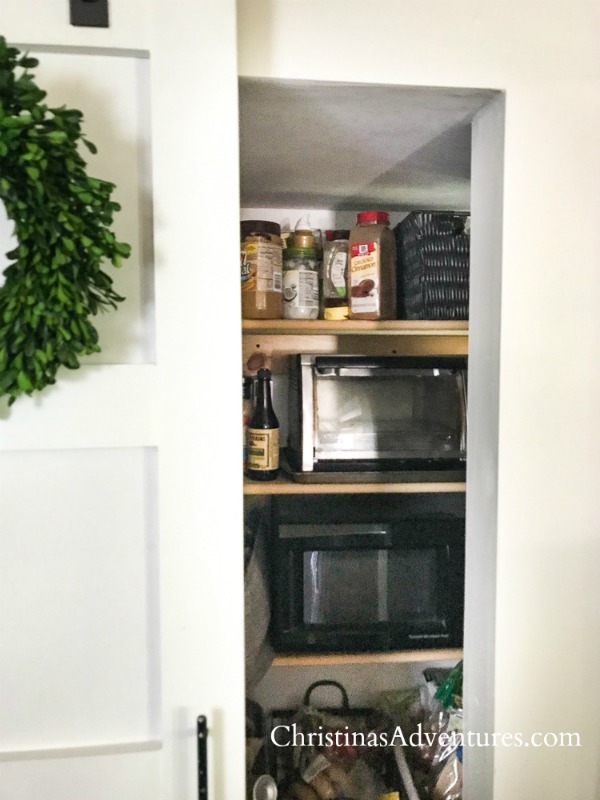
How to hide a microwave:
I had a reader on Instagram asking about where we have our microwave, and I realized that I don’t think I’ve ever shown this! We actually have our microwave and toaster oven inside of our pantry. We had our electrician add in an extra outlet when we wired the kitchen, and we were able to put these small appliances in our pantry.
Just make sure if you’re thinking about doing the same that your pantry has adequate ventilation and space so this is a safe option.
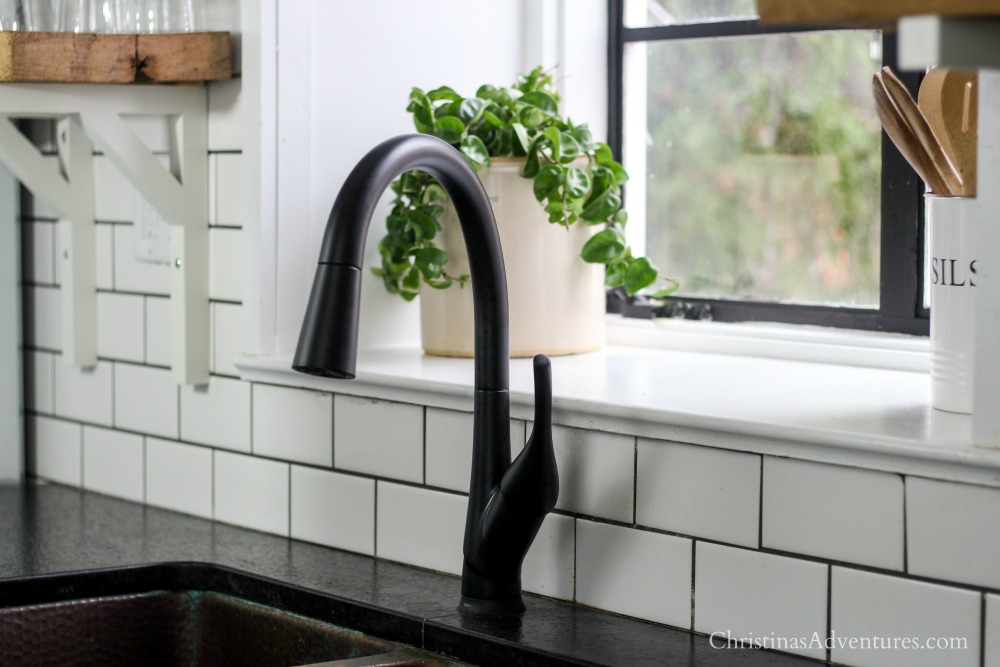
Our touch faucet:
We also changed out our faucet since we made over our kitchen. There was nothing wrong with our old faucet, but I had the opportunity to work with Delta Faucet and I jumped at it!
I really like our new faucet – my kids love the touch feature as well, and we all really like the color sensor to tell if the water is hot, cold, or warm. The ONLY thing that I didn’t like was that on really cold days in the winter, our faucet wasn’t as touch sensitive as it usually is. The window we have behind it is super old and drafty, so it must have made the faucet too cold.
Other than that, we love it! Come see more about this faucet with it’s crazy technology here.
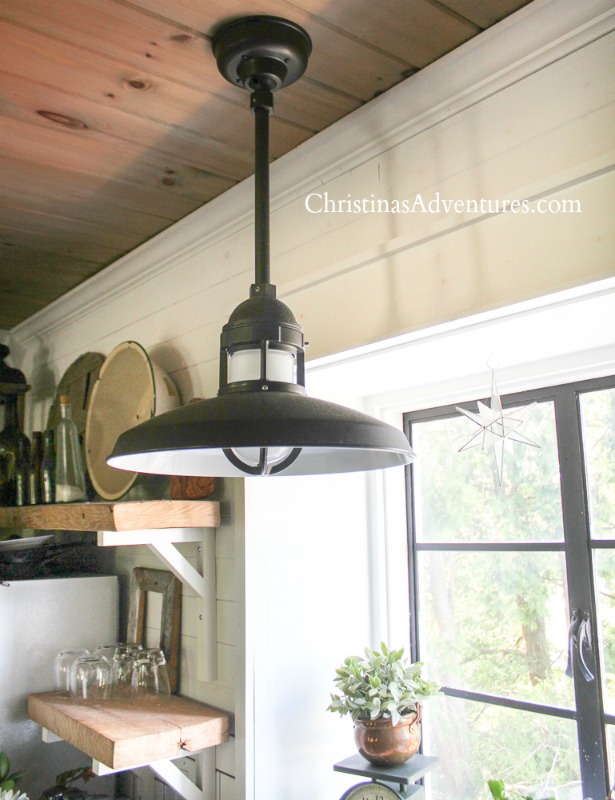
Our farmhouse kitchen lighting:
I honestly cannot say enough good things about our lighting from Barn Light USA. Although I partnered with them a few years ago for these products, they have no idea I’m talking about them today and they definitely aren’t expecting me to or paying me to tell you anything positive.
My honest thoughts? Barn Light USA lighting isn’t cheap. It’s not something I’d install in a home that I wouldn’t be living in for a while if I was on a budget. But if you’re able to afford the products, I truly think they’re the best. I stand behind them and their products 100% and I’d definitely recommend them.
Shop the light above our kitchen sink here.
So – if you made it to the end of this post, you deserve a prize! I hope this was helpful to you whether you’re looking to do minor upgrades to your kitchen or if you’re looking to do a complete makeover.
As always – reach out to me on Instagram or Facebook or through the comments here with any further questions!
If this farmhouse kitchen update post was helpful to you, please consider sharing with others or saving for later by pinning it here!
Shop our kitchen products here:

We have been renovating our home for 2 years and we are finally somewhat coming to an end. I put tin our laundry room for the ceiling and we were thinking about doing the same for our pantry but I just wasn’t feeling it! I am so excited I came across this post because you have SOLD me on the wood planks for the ceiling!! I LOVE it!!! I can’t wait to do it this weekend!!!
Hi. We are days away from doing the same wall look. Half subway tile and half ship lap. How did you get the tile to be the same depth as the boards? Our builder is ordering tongue and groove for the walls as the ship lap look the tiles are much thinner. Thank you!
honestly i don’t remember it being an issue? The tongue in groove boards that we bought were pretty thin
Hi there,
Your kitchen looks great! Did you use any type of transition between the shiplap and the tile or do they butt up together pretty well?