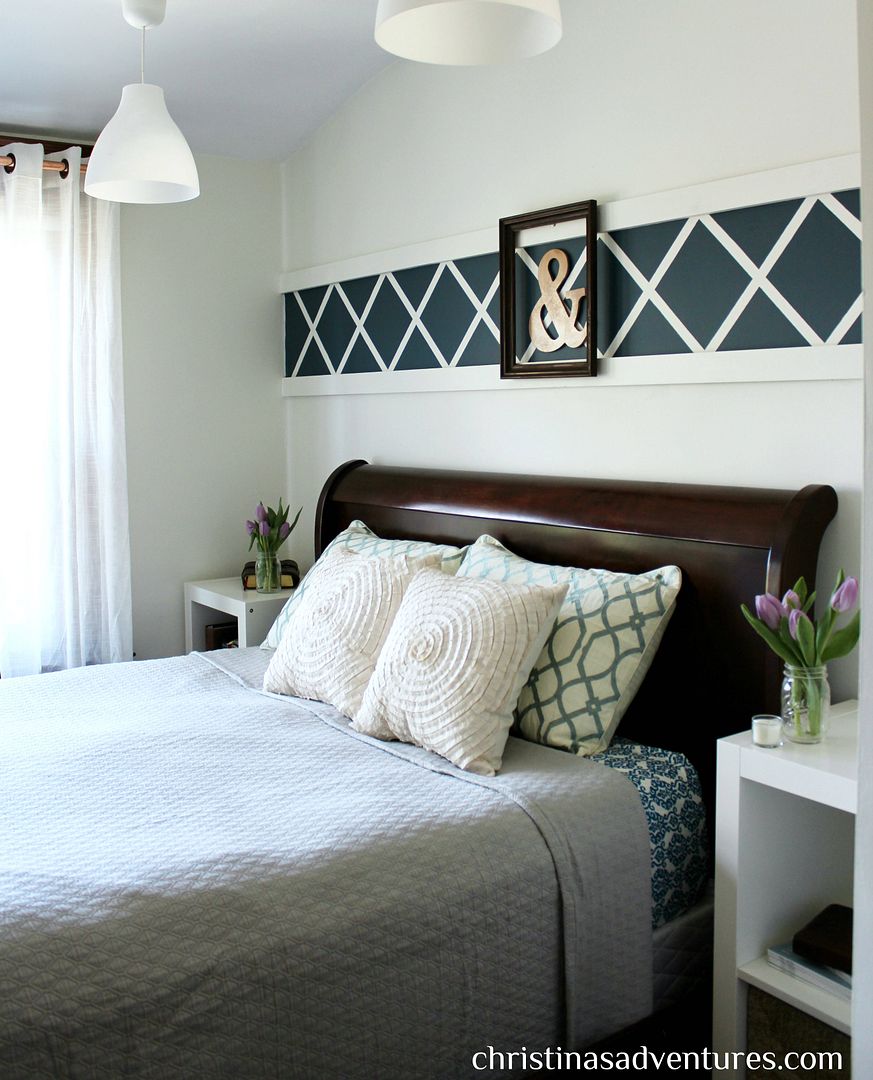
I know we just finished our kitchen remodel, but DIY never rests! We were looking to make over another space, but not spend nearly as much time/money. Our master bedroom was the perfect spot – it’s been neglected since we moved in last year, and it was time to make it a more welcoming space!
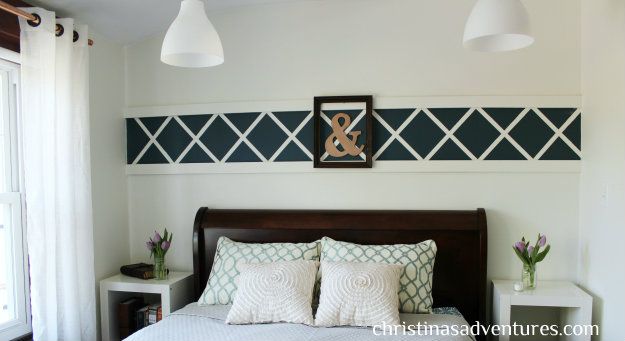
After brainstorming for a few weeks, I decided to make a statement above our bed using inexpensive pine, painters tape, and paint. It was so simple – you can easily do this in your home as well!!
Want to see what our bedroom used to look like?

Ah OK OK, so we ripped out the crazy carpet & refinished the existing subfloor before we moved in. But then it was just sad and looked like this for the last year:

Whomp whomp whomp. Nothing too horrible, just totally boring. See how the wall behind the bed really needed something??

OK- I promise it was so easy. Here’s how we did it:
First, figure out how much space you want between your two wood beams. Mark this off with a chalk line. Then, mark every foot on each of the chalk lines and connect your marks with painters tape on a diagonal:
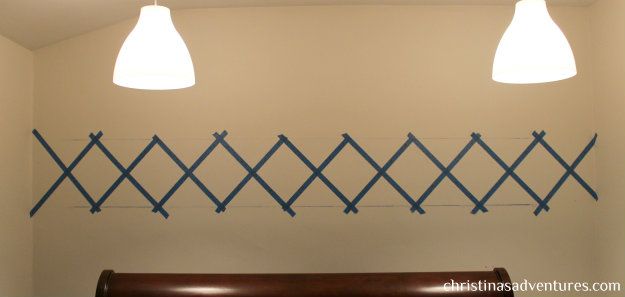
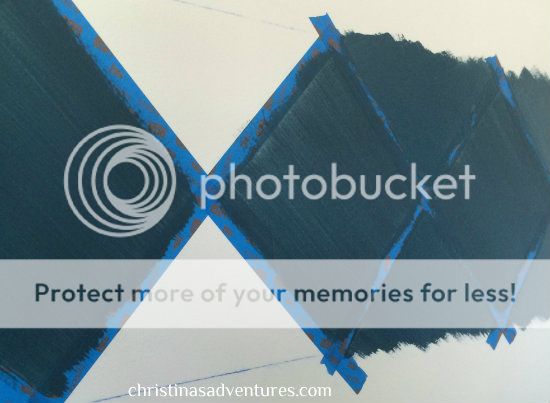
Now it’s time to paint – I used two coats & it worked out well! Thrifty tip: just use a paint sample from the hardware store – it’s more than enough for a small project like this and it will only cost about $2-3!
Now it’s time to prep your wood. Measure out your space, and have your local hardware store cut down your wood for you. See – simple!! Then paint your wood before you put it up on the wall – we chose to paint it the same color as our walls, but you could choose to stain it or paint it a different color.
Once you’ve prepped your wood, you’re going to want to attach it to the wall. Since our walls are plaster, we have a hard time nailing things into the wall. We used wood glue to attach it to the wall:

We wanted to clamp our project, but it’s kind of impossible to do so on a wall like this. We used some concrete nails as a kind of a “clamp” for this project – just one on each end & one in the middle can help hold it in place:

Finally, I filled in some spaces with wood filler, painted over them (& touched up a few bleeds in the painters tape area). I then caulked the ends of the wood to fill it in where it met the walls on either end. When in doubt – caulk. That stuff is amazing!
I was planning on leaving it like that, but realized it needed something in the middle. I picked up this cute ampersand from WalMart for less than $2, and gave it a coat of spray paint. I added a thrift store frame, and called it a day!
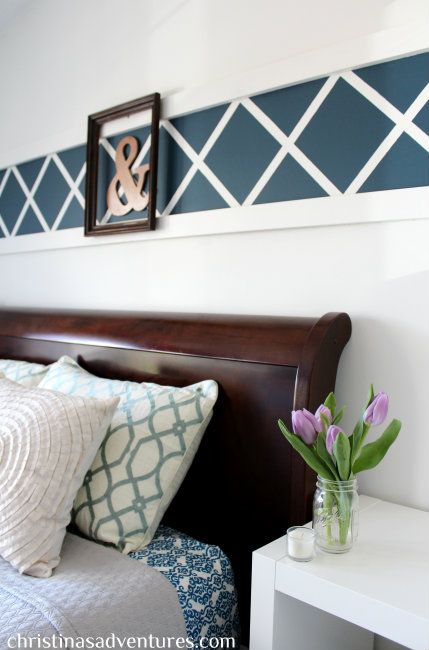
I am kind of in love with it.
PS – love my bedding? I’m giving away $200 to BeddingStyle.com here!!

The whole project cost under $50 – which is a huge win in my book! What a big impact for such a small amount of money.
What do you have above your bed? Is your bedroom the last place in the house to get decorated too?

Like this post? You’ll also like:
1. DIY Kitchen Renovation: Before & After (for under $3,500!)

wow, makes such a statement, i love it!
Wow!!!!
I am in love with the wall over your bed…
I am so wishing I didnt have a window behind my bed!!!!
Great job!! Definitely pinning this!
Thanks so much!! I’ll be posting a round up of all different ‘above the bed ideas’ soon- I’m making sure I include rooms with windows above the bed for people with your situation too!!
What a great idea! I’ve never seen anything like this! Not too complicated of a process but what a statement it makes in the room!
Not complicated at all!! Thanks so much for the kind words
Beautiful job, Christina! I love the colors and design!
Thanks so much Kristi!!
I like your idea, it looks elegant and beautiful. Thank you for sharing this kind of DIY project.
This is amazing! I have been wanting to do something on one wall in my study. I was thinking a wood palette wall. Maybe I can incorporate this into it somehow. I LOVE this look! I just stumbled across your blog and am so happy I did. You are one talented lady 🙂
looking at the picture thought this was going to be impossible but your instructions are so easy to follow I think I’ll give this a try wish me luck :p